
What this worksheet helps children practise
Line up one edge of a card square along a ray first, then check whether the second ray hugs the other edge!
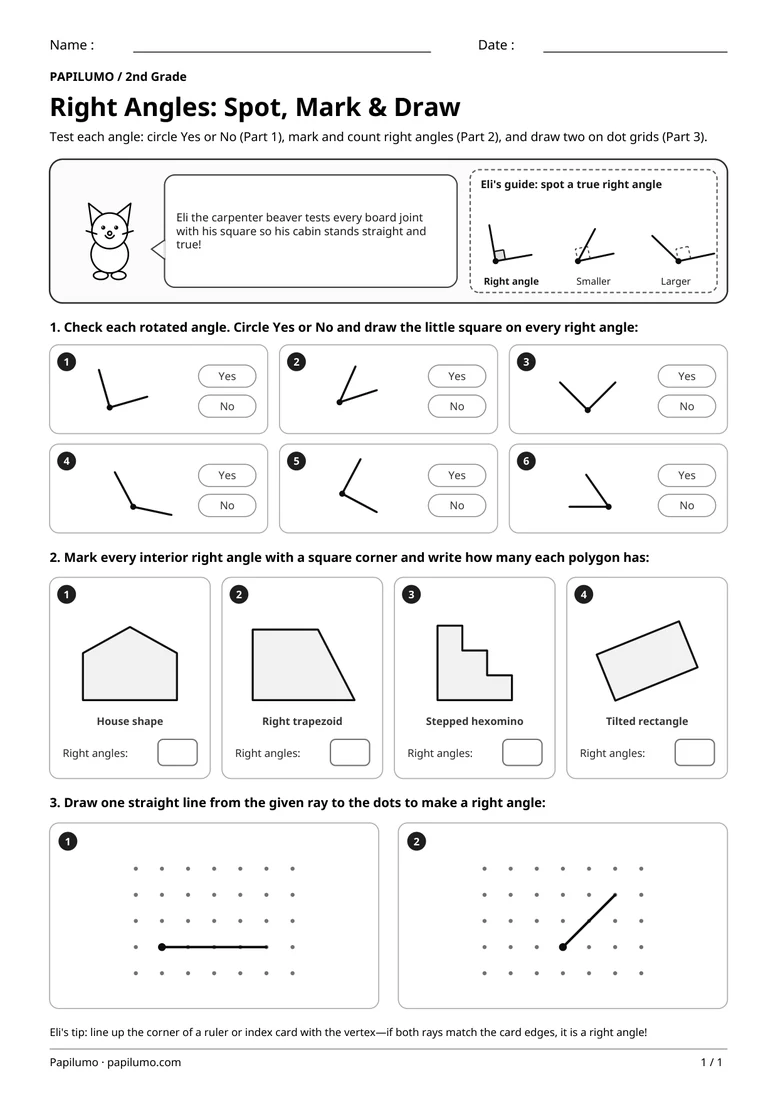
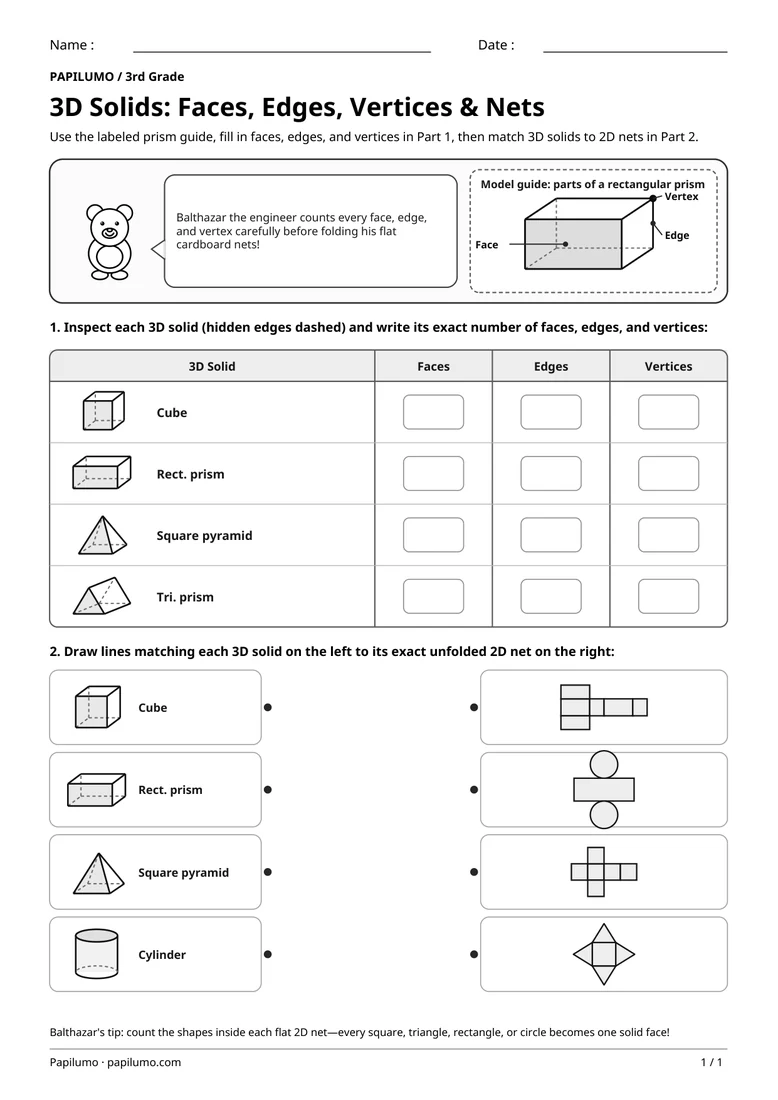
Understanding right angles in 2nd Grade means learning to test the true geometric opening at a vertex rather than only spotting straight vertical and horizontal lines on paper. By comparing rotated rays directly against a reliable square-corner tester, marking every 90-degree interior corner with the standard square symbol inside irregular and tilted shapes, and drawing perpendicular segments cleanly across dot grids, young learners build lasting spatial confidence that prepares them smoothly for classifying squares, rectangles, and right triangles across elementary geometry. For a related skill, use 3D Solids: Faces, Edges, Vertices, and 2D Nets with Balthazar (3rd Grade): Use the labeled prism guide, fill in faces, edges, and vertices in Part 1, then match 3D solids to 2D nets in Part 2.
Preparing a short session
Print the student worksheet at 100% scale on crisp white A4 paper without shrinking page margins, and set out a sharpened pencil, a clean eraser, a short straightedge ruler, and a reliable square-corner tester such as a stiff index card or plastic set square. Keep the separate one-page answer key completely out of sight until all three parts are finished. Before starting Part 1, look at Eli's top guide together so your child sees clearly how acute and obtuse openings differ from a square corner.
A concrete example to get started
In the top guide beside Eli the carpenter beaver, three tidy diagrams demonstrate exactly how a carpenter square works: on the left, a true right angle matches the dashed square corner neatly along both rays; in the middle, a smaller acute angle tucks tightly inside the dashed square; and on the right, a larger obtuse angle opens wide past it. Having that visual benchmark at the top helps students verify rotated angles accurately, since turning a ray never changes whether two sides meet squarely.
Supporting the activity
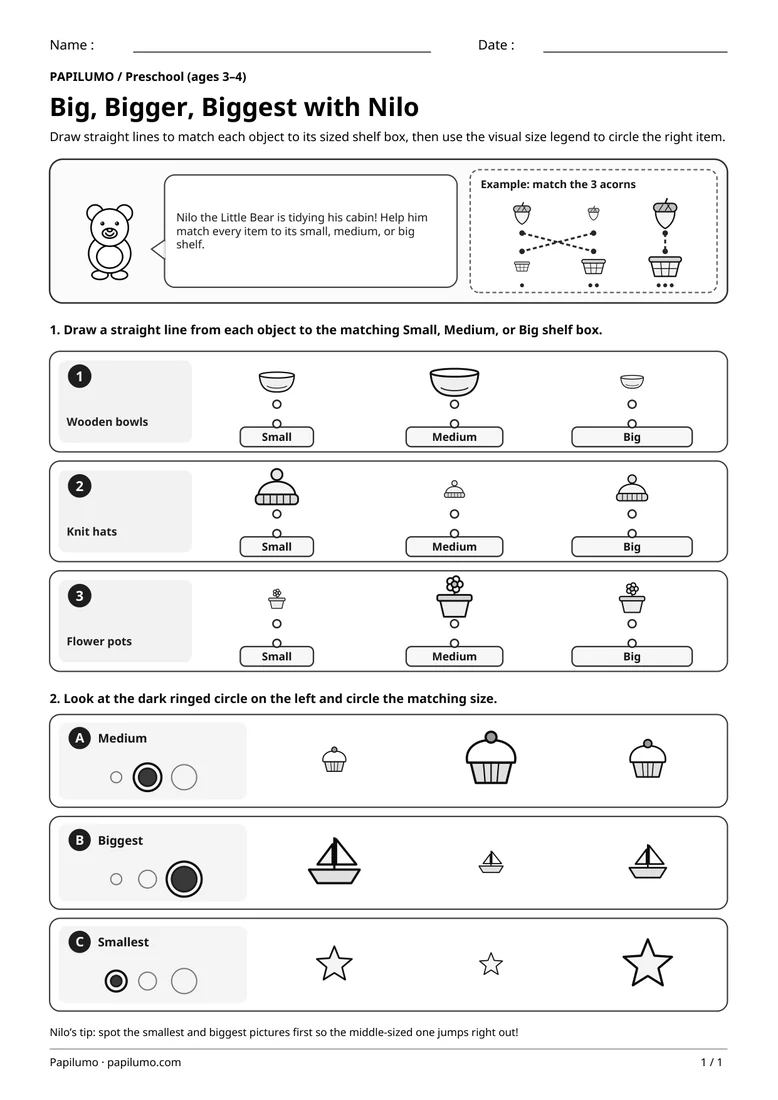
Part 1 presents six rotated standalone angles where students circle Yes or No and draw a crisp square-corner symbol inside the three true right angles (numbers 1, 3, and 5), marking No for the acute and obtuse distractors (2, 4, and 6). Part 2 features four distinct polygons—a wide-roof house pentagon (2 right angles), a right trapezoid (2), a six-square stepped hexomino (6), and a tilted rectangle (4)—asking learners to mark every right corner inside and record the total. Part 3 finishes two perpendicular rays on dot grids. To vary the practice, try Big, Bigger, Biggest: Order 3 Sizes with Nilo: Draw straight lines to match each object to its sized shelf box, then use the visual size legend to circle the right item.
What to notice and how to check
Check completed pages side by side with the separate one-page answer key PDF: Part 1 shows Yes or No circled cleanly alongside square-corner marks on angles 1, 3, and 5, Part 2 marks every interior right corner with exact totals 2, 2, 6, and 4 below each polygon, and Part 3 shows valid perpendicular rays drawn cleanly on both dot grids. If a tilted polygon tricked your student, rotate the sheet on the table or rest an index card corner right inside the vertex to confirm.
Making the task easier
Rotate the sheet on the desk until one ray points straight across or straight down before checking.
Keep the learning aim, but reduce how much the child has to handle at once. Cover part of the page with another sheet and reveal one task at a time. Demonstrate a separate example, then leave a real opportunity to work something out. An answer reached with support is still a useful attempt; it does not yet show that the same task can be completed independently.
Taking the idea beyond the worksheet
Find four objects around your desk that each have four right angles and trace one corner on scrap paper.
Use the follow-up to meet the same idea in a different setting. Offer it once the first task makes sense, without insisting that the whole page must be perfect. The child might explain a strategy, make an example or set a challenge for an adult. Return to the worksheet only when it helps connect the two situations. A short conversation or a practical activity can be enough to finish the session. To continue exploring, use Polygons: Count Sides and Vertices with Balthazar: Mark each corner (vertex) with a pencil dot, count the straight sides and vertices, then write both numbers.
Downloading and printing the PDF
This free PDF contains one worksheet designed for A4 paper. Download the file using the button on this page and open it in your PDF reader. Choose actual size or a 100% scale, check the orientation in the print preview and turn off any browser headers or footers. The illustrations use vector lines, so their outlines stay sharp when printed. Check the margins on one copy before preparing several sheets for a group. The level shown on the page is a guide, rather than a requirement to complete the activity at a particular age.