

What this worksheet helps children practise
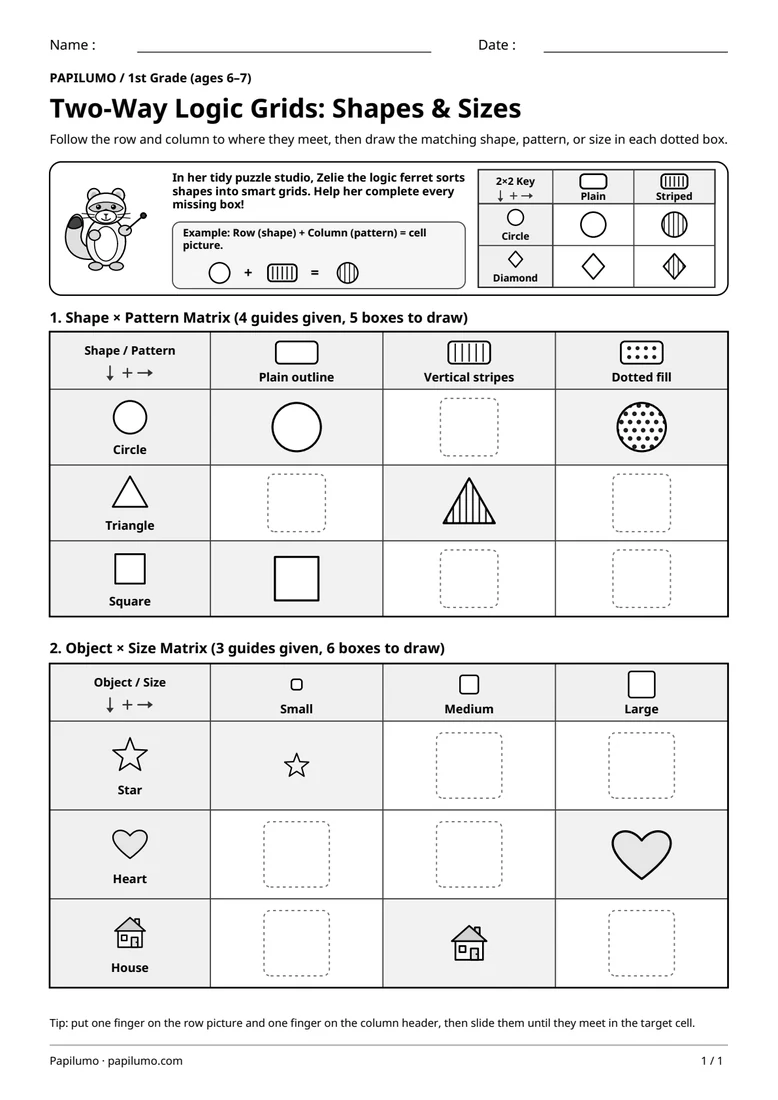
Slide one finger across the row and one down the column until they meet before drawing your shape!
Reading and completing a two-way matrix in 1st grade builds foundational logical reasoning, coordinate tracking, and careful visual discrimination. At ages six and seven, young children move beyond sorting objects by a single rule to coordinating two independent attributes at once: choosing the exact shape dictated by the row while applying the pattern or size dictated by the column. That dual-criteria thinking directly prepares learners for reading data tables, understanding multiplication arrays, exploring early coordinate grids, and tackling structured problem solving across math and science. For a related skill, use 4 × 4 Picture Sudoku for Kids: Sea Animals: Cut out the eight pictures and complete the grid.
Preparing a short session
Print the student worksheet at actual size (100%) on plain white letter or A4 paper without shrinking margins, and provide a sharpened pencil with a soft eraser. Keep the separate PDF answer key tucked completely out of sight while your child works independently. Before drawing a single line, examine Zelie the logic ferret and the solved 2×2 key intersection diagram at the top right together. Name every row and column header aloud, then practice sliding two fingers from a row and column until they meet inside one dotted guide frame.
A concrete example to get started
In the top banner beside Zelie the logic ferret, the solved 2×2 diagram demonstrates the exact grid rule at a glance: take the shape from the row (circle or diamond) and combine it with the pattern from the column (plain outline or vertical stripes). Where row and column cross, children see the plain circle, striped circle, plain diamond, and striped diamond clearly drawn, stopping beginners from blindly copying a neighboring cell without checking both headers carefully.
Supporting the activity
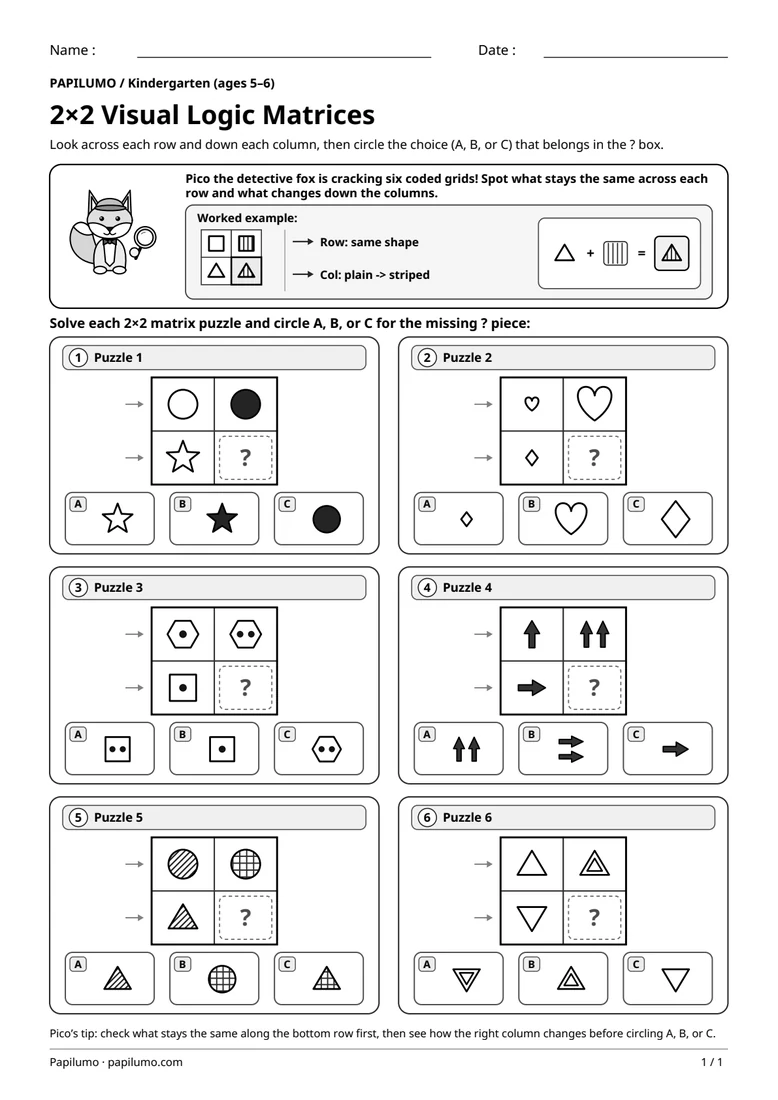
In Part 1, the 3×3 matrix provides four pre-filled anchor figures as guides—plain circle, dotted circle, striped triangle, and plain square—leaving five dotted guide boxes for the pupil to draw: striped circle, plain triangle, dotted triangle, striped square, and dotted square. In Part 2, three given guides establish the three size steps clearly: a small star, a large heart, and a medium house. Students draw the remaining six objects carefully to match both headers: medium star, large star, small heart, medium heart, small house, and large house. To vary the practice, try 2×2 Visual Logic Matrix Puzzles with Pico the Detective Fox: Look across each row and down each column, then circle the choice (A, B, or C) that belongs in the ? box.
What to notice and how to check
When checking finished work with the separate one-page answer key, inspect Part 1’s five drawings first for both accuracy criteria: exact outer shape and exact inner fill (clean blank interior for plain outline, upright vertical lines for stripes, and distinct dots for dotted fill). Next, check all six drawings in Part 2 to make sure small, medium, and large show three clear size steps in every row. If any box shows the wrong combination, slide two fingers from both headers again before erasing and redrawing neatly.
Making the task easier
Lay a strip of paper under the row you are working on so your eyes stay steady while checking the column.
Keep the learning aim, but reduce how much the child has to handle at once. Cover part of the page with another sheet and reveal one task at a time. Demonstrate a separate example, then leave a real opportunity to work something out. An answer reached with support is still a useful attempt; it does not yet show that the same task can be completed independently.
Taking the idea beyond the worksheet
Add a fourth column labeled “checkered” on scrap paper and draw a checkered circle, triangle, and square.
Use the follow-up to meet the same idea in a different setting. Offer it once the first task makes sense, without insisting that the whole page must be perfect. The child might explain a strategy, make an example or set a challenge for an adult. Return to the worksheet only when it helps connect the two situations. A short conversation or a practical activity can be enough to finish the session. To continue exploring, use Cut and Paste Shapes: Circle, Square and Triangle: Cut out the six cards and stick them in the right family.
Downloading and printing the PDF
This free PDF contains one worksheet designed for A4 paper. Download the file using the button on this page and open it in your PDF reader. Choose actual size or a 100% scale, check the orientation in the print preview and turn off any browser headers or footers. The illustrations use vector lines, so their outlines stay sharp when printed. Check the margins on one copy before preparing several sheets for a group. The level shown on the page is a guide, rather than a requirement to complete the activity at a particular age.