

What this worksheet helps children practise
Count minutes in fives starting at 12. Read the last hour passed by the short hand, even when it is close to the next number.
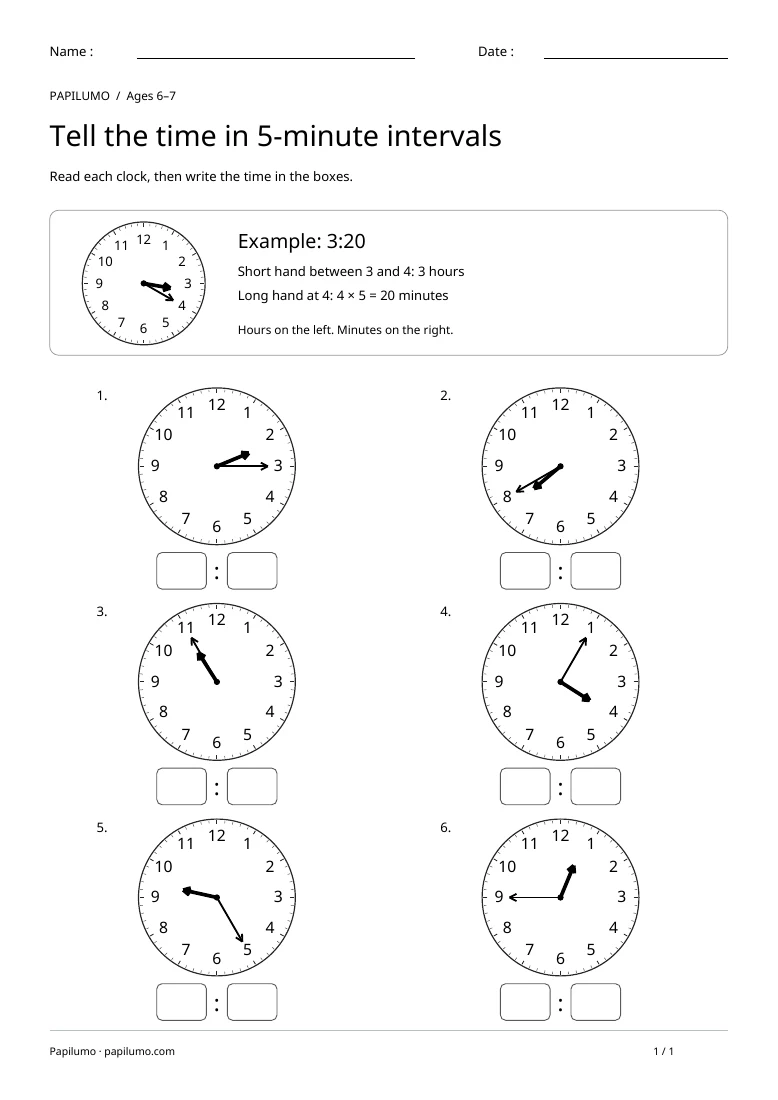
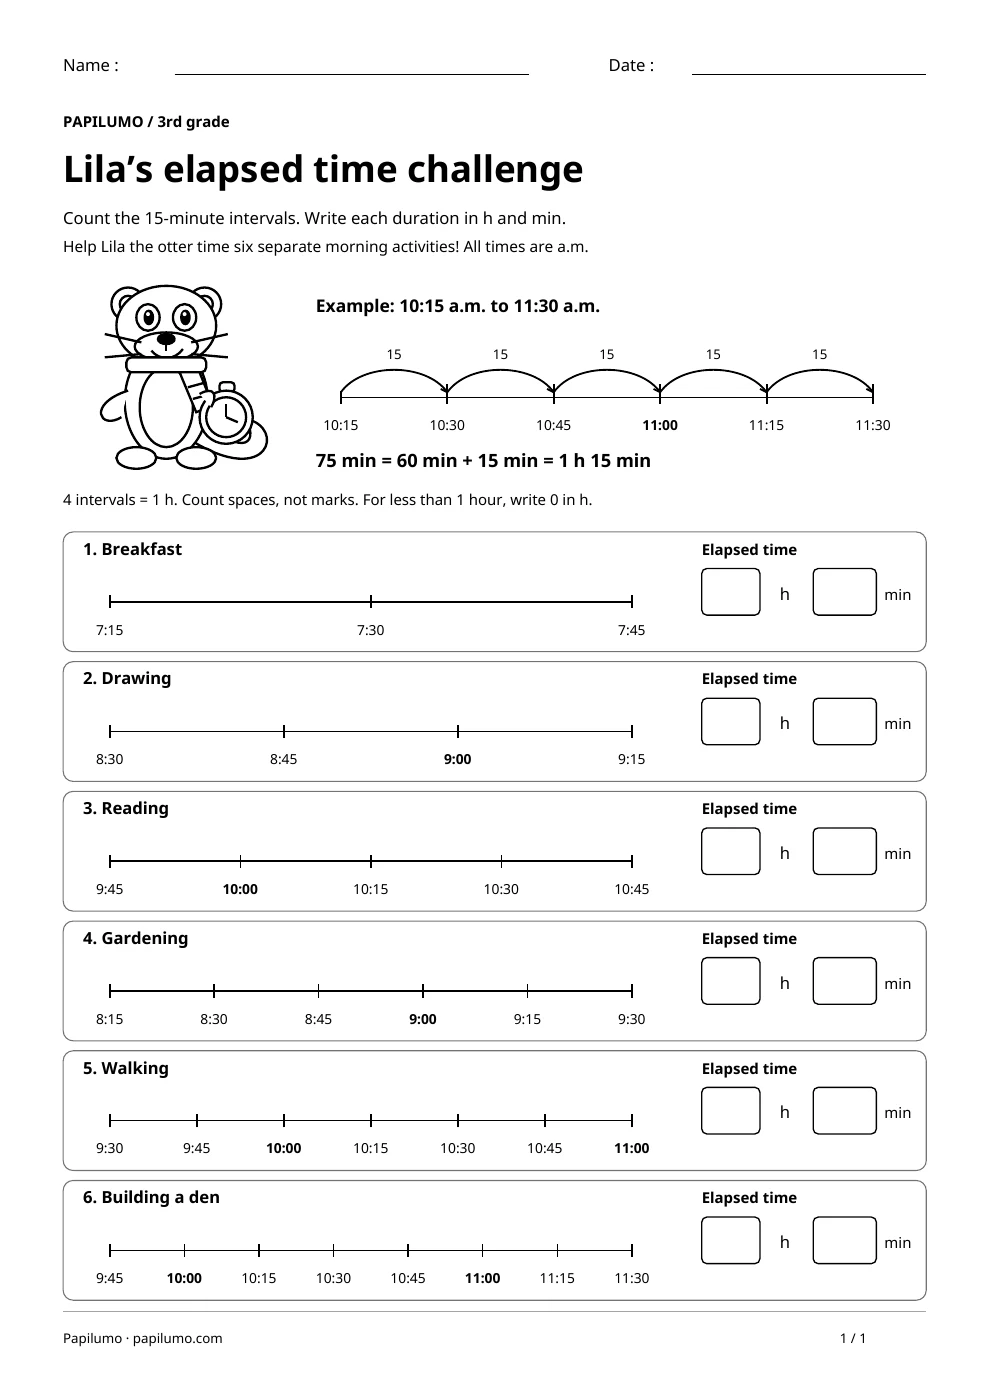
This worksheet develops reading analog clocks in five-minute intervals. The six exercises show 2:15, 7:40, 10:55, 4:05, 9:25 and 12:45. None of the answers is a whole hour or a half hour. Children need to recognize the clock numbers and count in fives up to fifty-five. The longer marks separate groups of five minutes; each smaller mark represents one minute. Both hands are already drawn, so the task is to read their positions and write a digital time. Hours go in the left box and minutes in the right box. Use this as an extension after the child understands simpler clock readings, rather than as a first introduction to telling time. For a related skill, use Elapsed time in quarter-hour intervals with Lila: Count the 15-minute intervals. Write each duration in h and min.
Preparing a short session
Set out a pencil, an eraser and, if available, a teaching clock with movable hands. Both hands are already drawn on this worksheet: the task is to read them and record a time in two boxes separated by a colon. Look at the model face first and locate 12 at the top, 3 on the right, 6 at the bottom and 9 on the left. Point out the common centre of the hands. Explain that length and direction are different features. The short hand can point up or down and still remains the hour hand.
A concrete example to get started
The worked example shows 3:20. The long hand points to 4. Starting from 12, count 5, 10, 15, 20: four intervals represent twenty minutes. The short hand lies between 3 and 4. Three o'clock has passed, but four o'clock has not yet arrived, so write 3 in the left box and 20 in the right box. In the first exercise, the long hand points to 3, meaning fifteen minutes, and the short hand has just passed 2. The answer is 2:15. The number indicated by the minute hand is not itself the number of minutes. Writing 2:03 would confuse the clock label with its minute value.
Supporting the activity
Ask the child to identify the short hand and then the long hand on each face. Let them explain what each tells us before filling in the boxes. The left box records hours and the right box records minutes. The clocks are not arranged in increasing order, so every picture needs attention. If the child rushes, ask them to read their written answer back while pointing to both hands. Covering the other clocks may help them concentrate on one. All the information is in the drawing: no speed target or guess about the next answer is needed. To vary the practice, try Read the clocks: half past: Read each clock, then write the time in the boxes.
What to notice and how to check
The answers in order are 2:15, 7:40, 10:55, 4:05, 9:25 and 12:45. At 10:55, the short hand is very close to 11 but has not reached it, so the hour is still ten. At 12:45, it lies between 12 and 1; keep twelve in the hour box. The answer 4:05 needs a zero before the five so that the minute box contains two digits. Check these challenges separately: identifying the hands, counting the minutes and choosing the hour already passed. The clocks do not identify morning or afternoon. The answer key therefore uses twelve-hour notation without an AM or PM label.
Making the task easier
To reduce the workload, show only the first two clocks and accept spoken answers before introducing writing. An adult can record what the child says, then invite them to copy one time into the boxes. This separates reading the clock from forming numerals. A movable teaching clock also lets a child reproduce the position before naming it. Gradually remove this support as the routine becomes familiar. If the hands are confused, return to their different lengths in the example. Adding more questions will not resolve a misunderstanding that has not yet been made clear. Start with 2:15 and 4:05. Add 05, 10, 15 and 20 to a separate practice clock, then remove these extra labels before returning to the worksheet.
Taking the idea beyond the worksheet
For another short activity, choose a clock from the page, cover the answer and ask the child to set it on a different clock face. Swap roles so the child sets a time and an adult reads it, with each explaining the clues used. An ordinary clock face does not show whether it is morning or evening. This activity therefore does not require a.m. or p.m., conversion to 24-hour time or elapsed-time calculations. Success means the child has read these particular positions; it does not yet show that they can read every minute on an analogue clock. Set a movable clock to 7:40 and then 7:45. Watch both hands move and ask how many minutes have passed between the two times. To continue exploring, use Read the clocks: whole hours: Read each clock, then write the time in the boxes.
Downloading and printing the PDF
This free PDF contains one worksheet designed for A4 paper. Download the file using the button on this page and open it in your PDF reader. Choose actual size or a 100% scale, check the orientation in the print preview and turn off any browser headers or footers. The illustrations use vector lines, so their outlines stay sharp when printed. Check the margins on one copy before preparing several sheets for a group. The level shown on the page is a guide, rather than a requirement to complete the activity at a particular age.