What this worksheet helps children practise
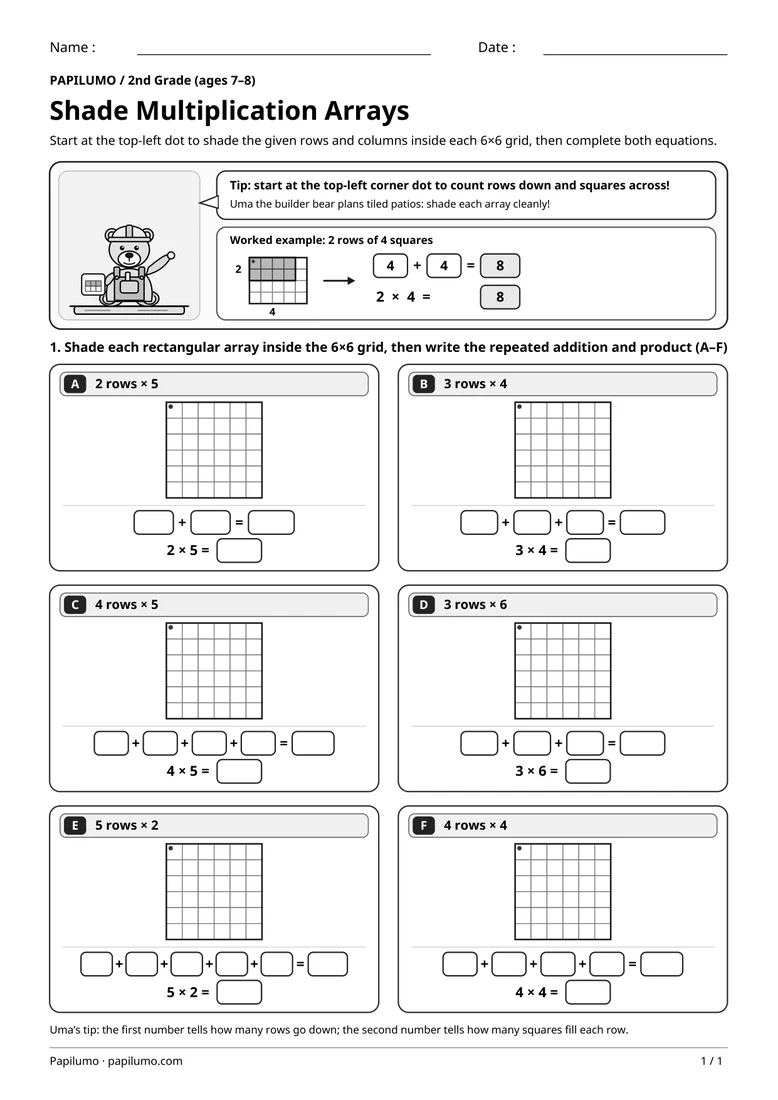
Count your rows down from the top-left dot first, shade every square across each row, then write that row length in the boxes!
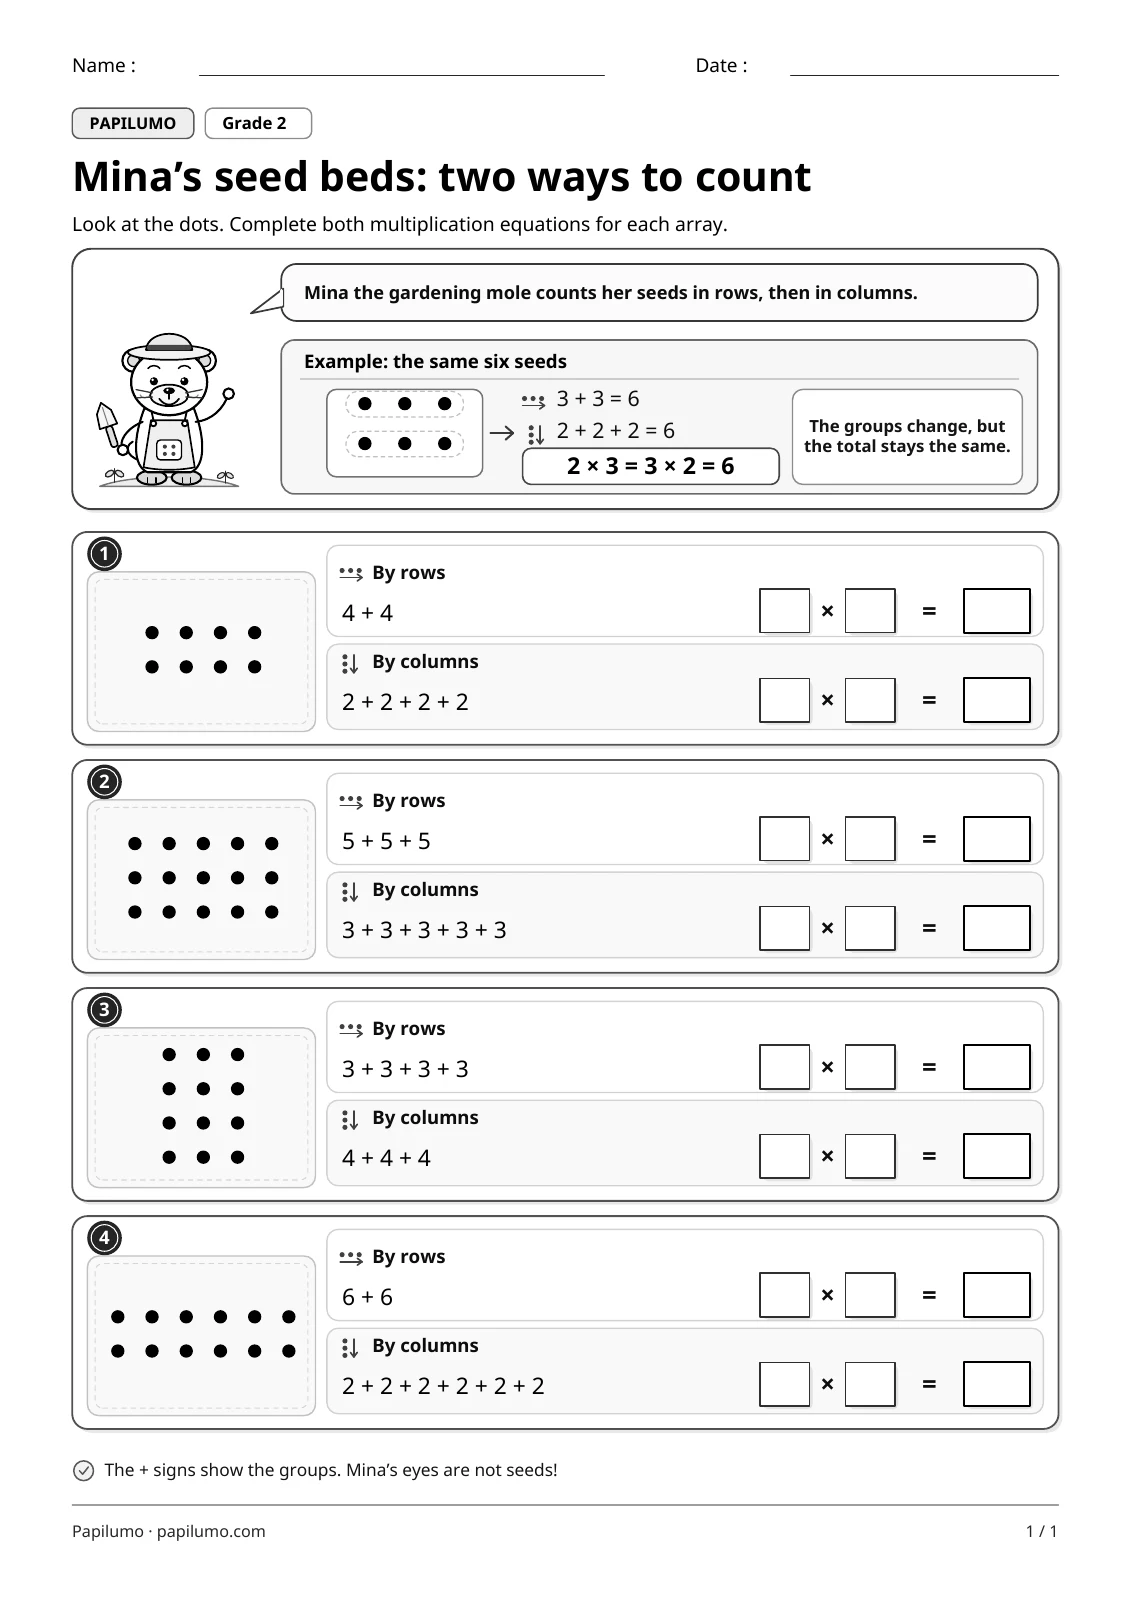
Shading rectangular arrays on grid paper gives 2nd Graders a concrete visual model for multiplication long before rote times-table drills take over. When children color 3 rows of 6 squares inside a blank grid, they see three equal horizontal bars stacked neatly together. Moving from the visual array to repeated addition and then to a multiplication fact clarifies what each factor means, reveals why 2 × 5 and 5 × 2 yield the exact same total, and lays early groundwork for area. For a related skill, use Multiplication arrays: rows and columns with Mina: Look at the dots. Complete both multiplication equations for each array.
Preparing a short session
Print the student worksheet at actual size (100%) on plain white letter or A4 paper without shrinking margins, and provide a sharpened pencil, a light shading pencil, and a clean eraser. Before starting cards A through F, inspect Uma the builder bear’s framed banner at the top of the sheet together, spot the tiny starting dot in the upper-left cell, and read both worked equations aloud. Keep the separate one-page answer key PDF tucked out of reach during independent work.
A concrete example to get started
In the worked model beside Uma the builder bear, a tidy 4×5 grid shows the first 2 rows of 4 squares shaded in soft gray starting right from the top-left corner dot. A clean arrow leads straight to the repeated addition chain 4 + 4 = 8 and the multiplication fact 2 × 4 = 8. This complete example shows students how to count rows downward first, count columns across second, and copy the row length into every addition box.
Supporting the activity
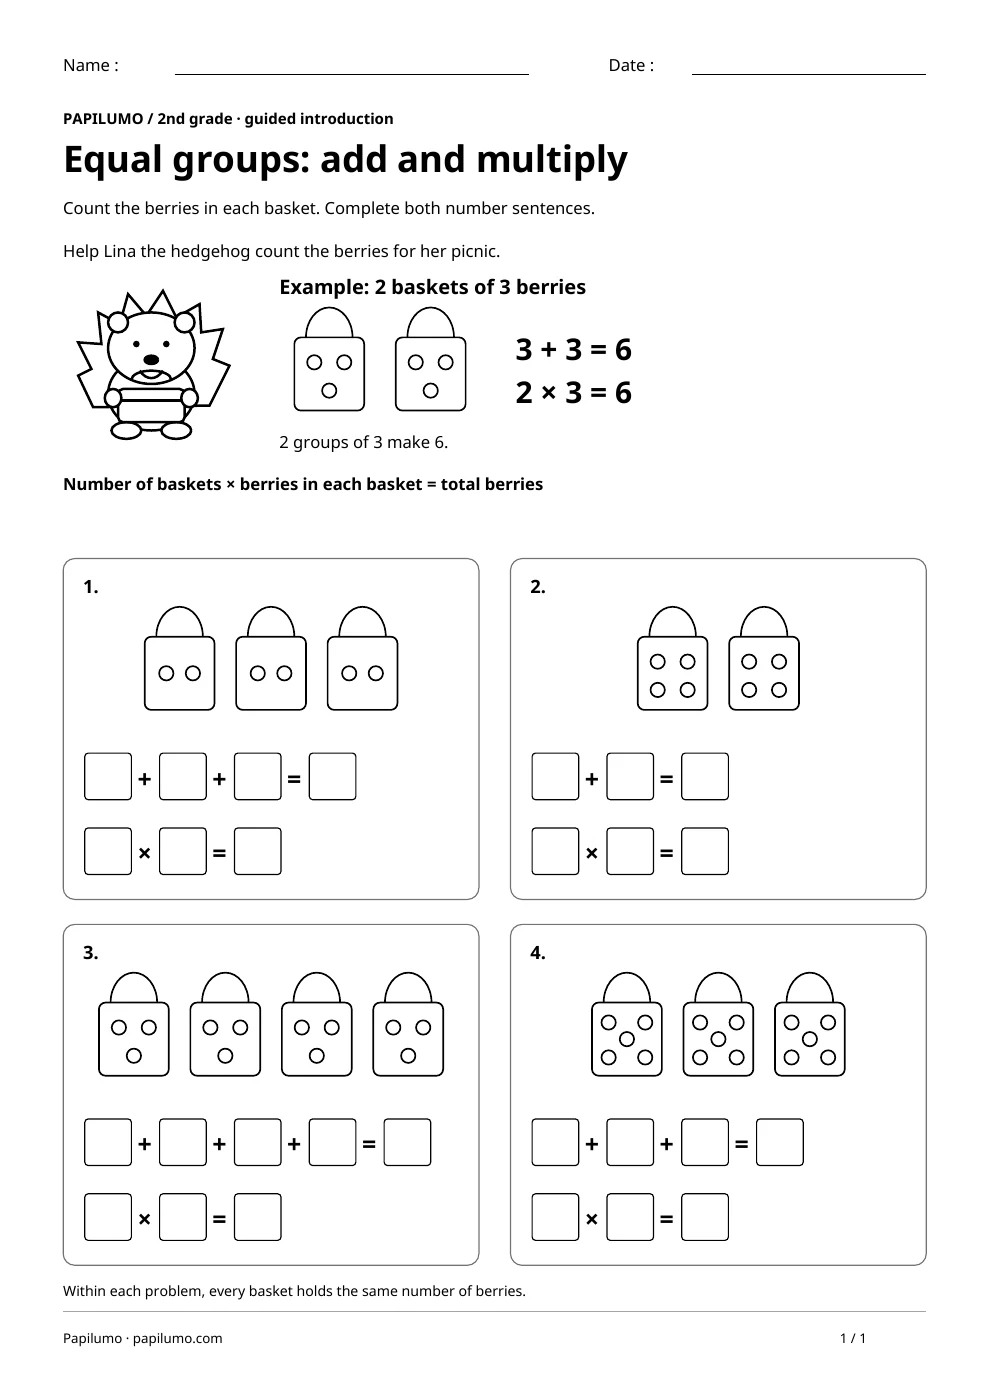
Cards A through F explore six varied array shapes up to 20 squares: card A builds 2 rows × 5 (5 + 5 = 10); card B shades 3 rows × 4 (4 + 4 + 4 = 12); card C fills 4 rows × 5 (5 + 5 + 5 + 5 = 20); card D stretches across all six columns with 3 rows × 6 (6 + 6 + 6 = 18); card E flips factors to 5 rows × 2 (2 + 2 + 2 + 2 + 2 = 10); and card F forms a 4 rows × 4 square (4 + 4 + 4 + 4 = 16). To vary the practice, try Repeated addition and multiplication: Lina’s berry baskets: Count the berries in each basket. Complete both number sentences.
What to notice and how to check
When reviewing finished pages against the separate answer key PDF, inspect each shaded 6×6 grid first to confirm the colored rectangle sits flush in the top-left corner without gaps and matches the requested orientation—wide 2 rows of 5 on card A versus tall 5 rows of 2 on card E. Next check carefully that every repeated-addition box holds the row size rather than the row count before verifying all six products (10, 12, 20, 18, 10, and 16). If a slip appears, recount row by row.
Making the task easier
Lightly outline the outer rectangle with your pencil from the starting dot before shading all the squares inside.
Keep the learning aim, but reduce how much the child has to handle at once. Cover part of the page with another sheet and reveal one task at a time. Demonstrate a separate example, then leave a real opportunity to work something out. An answer reached with support is still a useful attempt; it does not yet show that the same task can be completed independently.
Taking the idea beyond the worksheet
Compare card A (2 × 5) and card E (5 × 2): why do their shaded rectangles look turned differently yet still hold 10 squares?
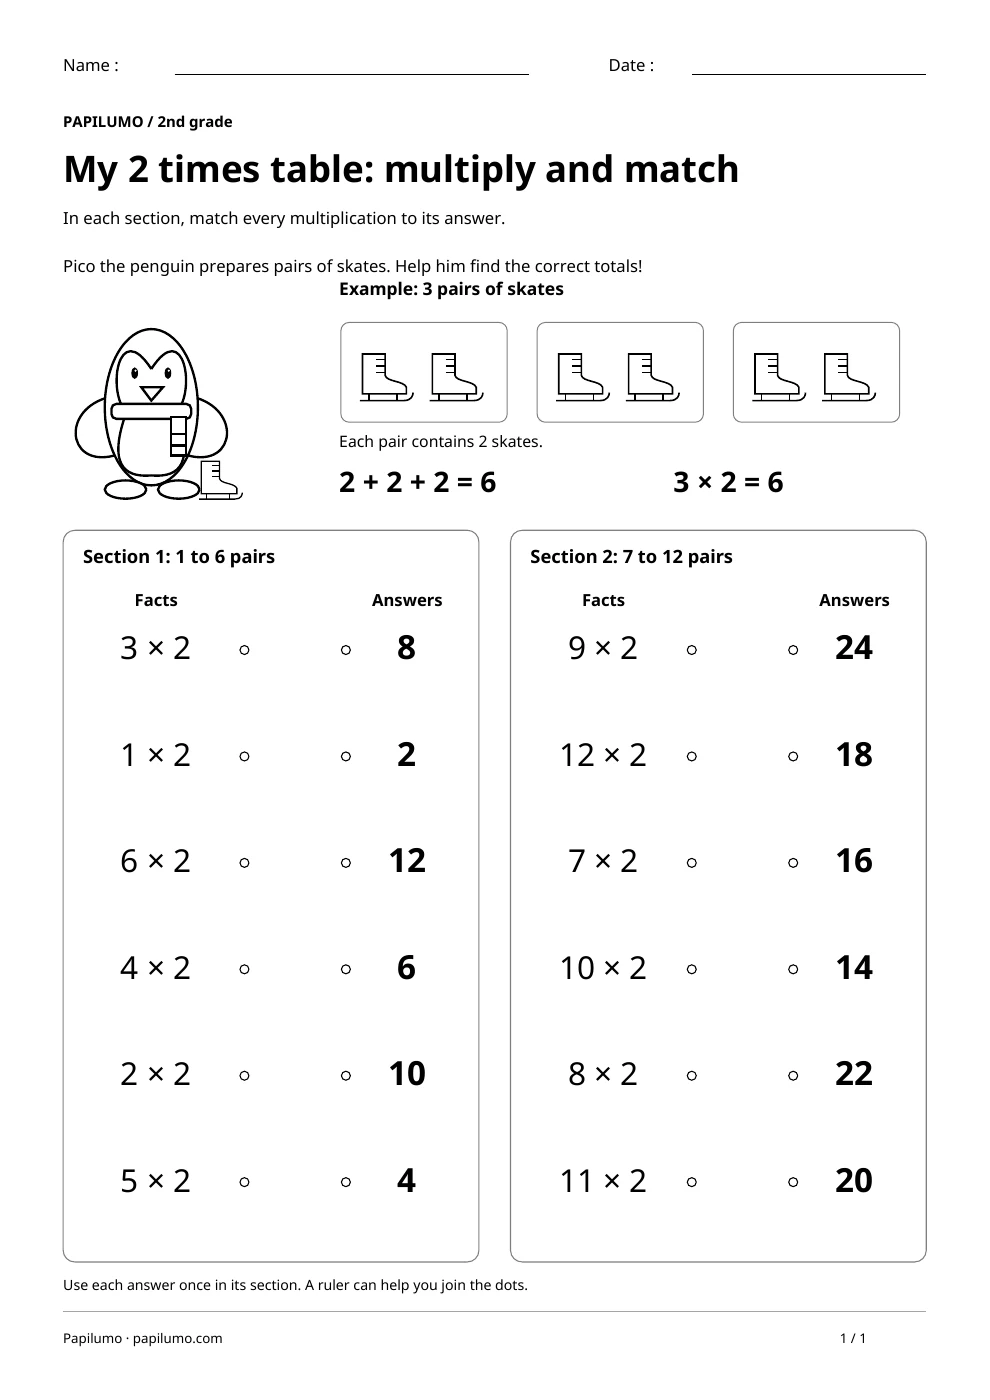
Use the follow-up to meet the same idea in a different setting. Offer it once the first task makes sense, without insisting that the whole page must be perfect. The child might explain a strategy, make an example or set a challenge for an adult. Return to the worksheet only when it helps connect the two situations. A short conversation or a practical activity can be enough to finish the session. To continue exploring, use 2 times table: multiply and match: In each section, match every multiplication to its answer.
Downloading and printing the PDF
This free PDF contains one worksheet designed for A4 paper. Download the file using the button on this page and open it in your PDF reader. Choose actual size or a 100% scale, check the orientation in the print preview and turn off any browser headers or footers. The illustrations use vector lines, so their outlines stay sharp when printed. Check the margins on one copy before preparing several sheets for a group. The level shown on the page is a guide, rather than a requirement to complete the activity at a particular age.