What this worksheet helps children practise
Notice a specific action, such as moving slowly, holding the page or spotting the endpoint. Finishing quickly is not the goal of Pico’s route.
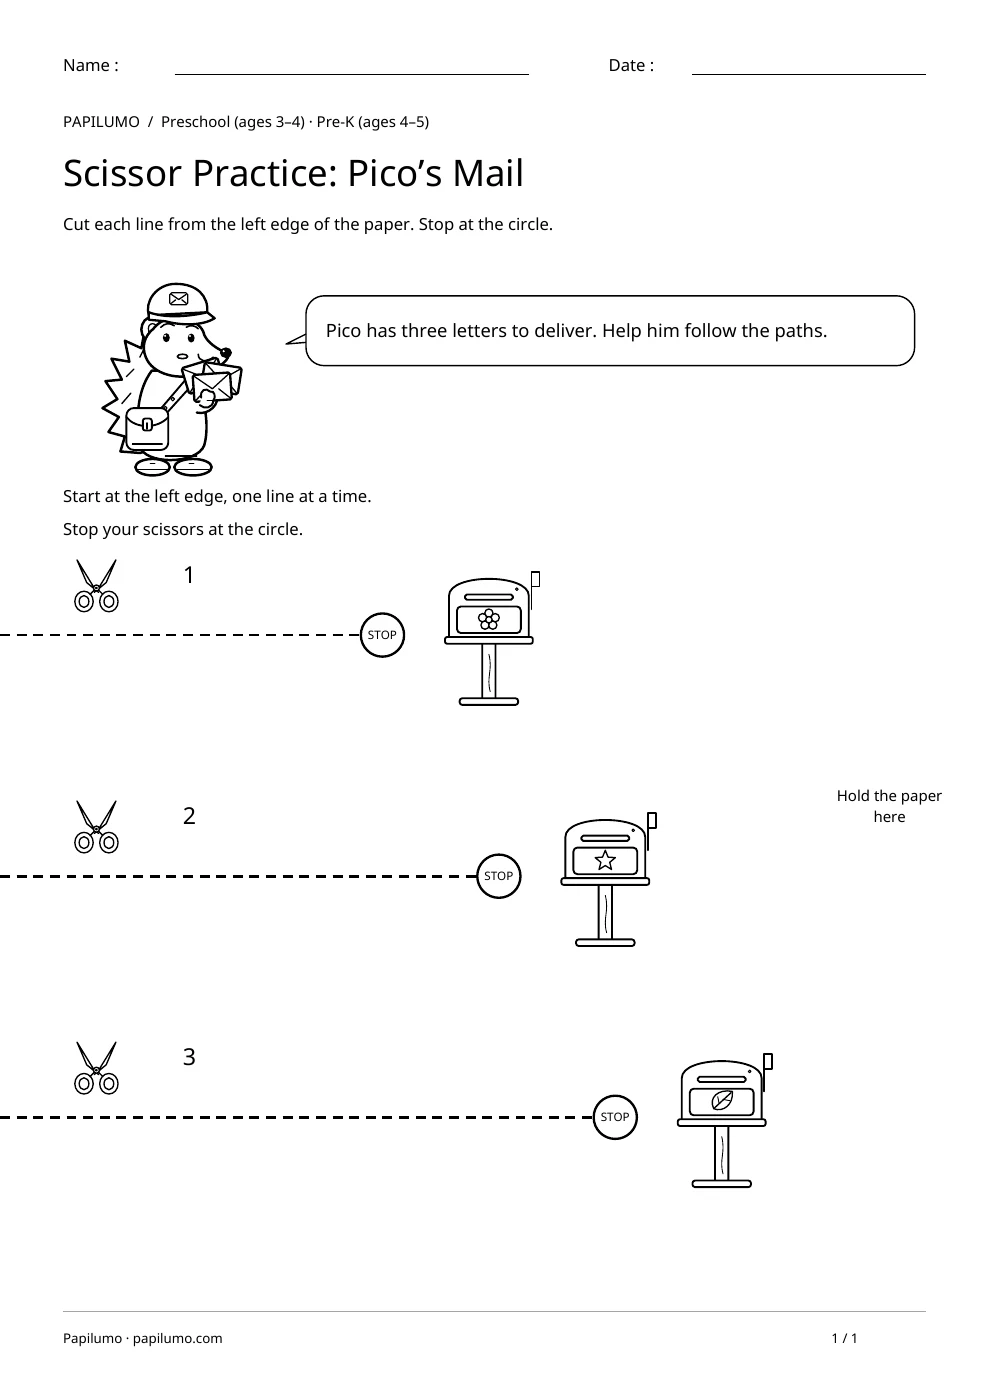
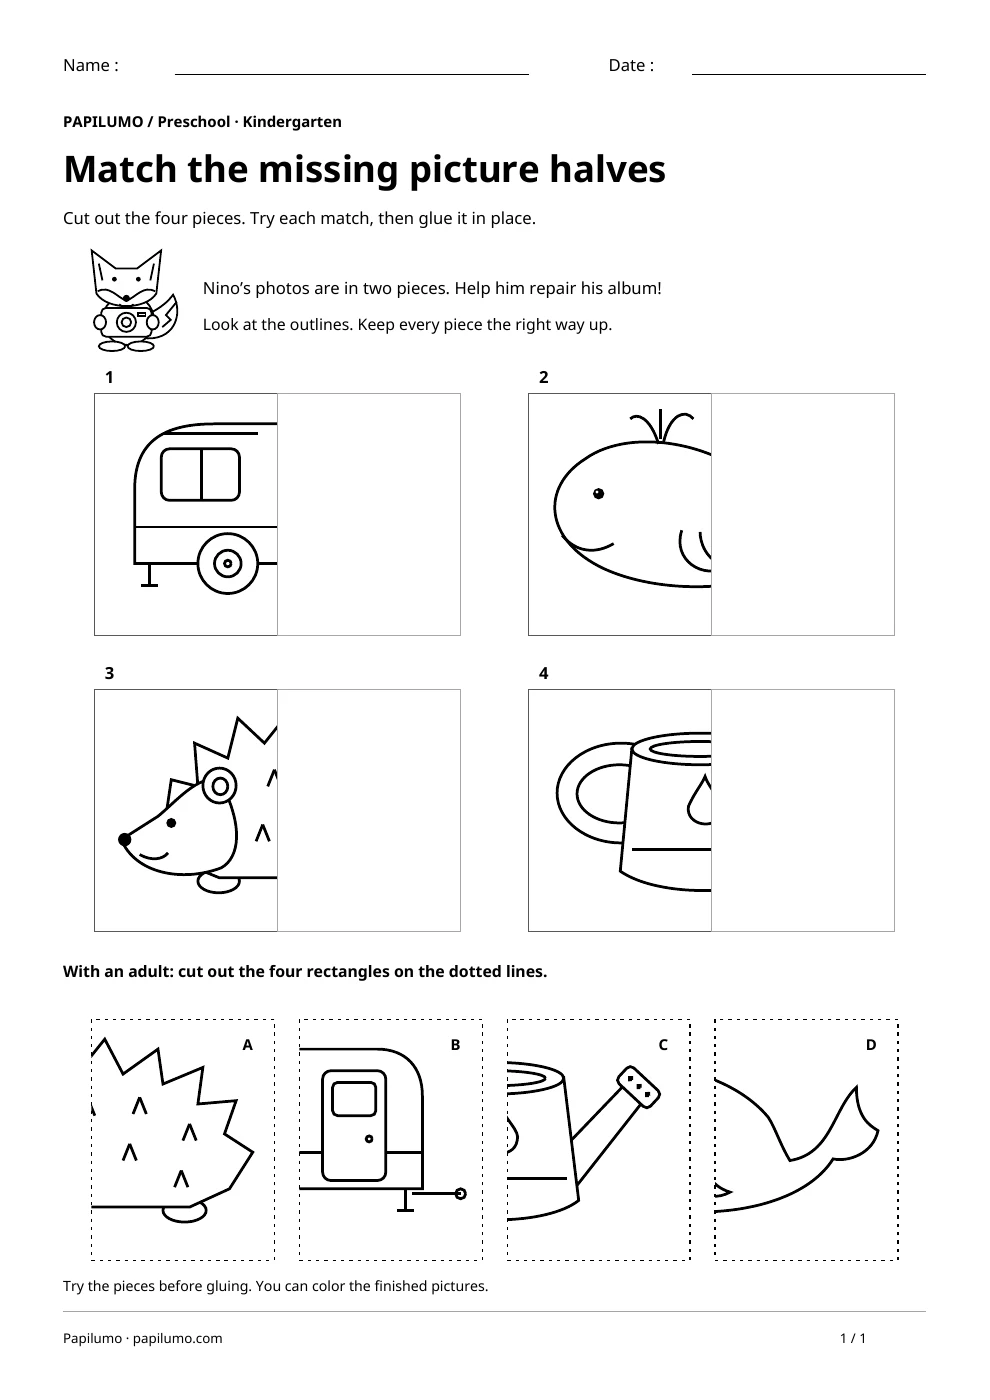
The activity practices opening and closing scissors, coordinating both hands and noticing a stopping point. One hand moves the scissors along the line while the other holds the paper in the clear area on the right. The paths measure about 3, 4 and 5 inches when printed at actual size. Each is slightly longer than the last, and all three stay straight. Preschool children can try the activity according to their experience. The numbers identify the order of the paths; independent number reading is not required. The circles mark where to stop. They are not shapes to cut out. For a related skill, use Picture halves: cut and paste the missing pieces: Cut out the four pieces. Try each match, then glue it in place.
Preparing a short session
Print at actual size. If your printer leaves a narrow white margin on the left, start at the paper edge in line with the printed dashes. Provide scissors suited to the child. An adult accompanies the activity and shows how to hold the right side of the sheet. Meet Pico and find his three letters and the mailboxes together. Follow the first path with a finger before cutting. Keep the adult reference beside you. It shows the cut lines and stopping points; it is not an extra cutting sheet or a set of pieces to prepare.
A concrete example to get started
Choose line 1, the shortest path. Place the scissors at its start on the left paper edge. Open them, move forward a little and close them along the dashes. Repeat until you reach the circle, then stop. The mailbox is farther to the right: look at it, but do not keep cutting toward it.
Supporting the activity
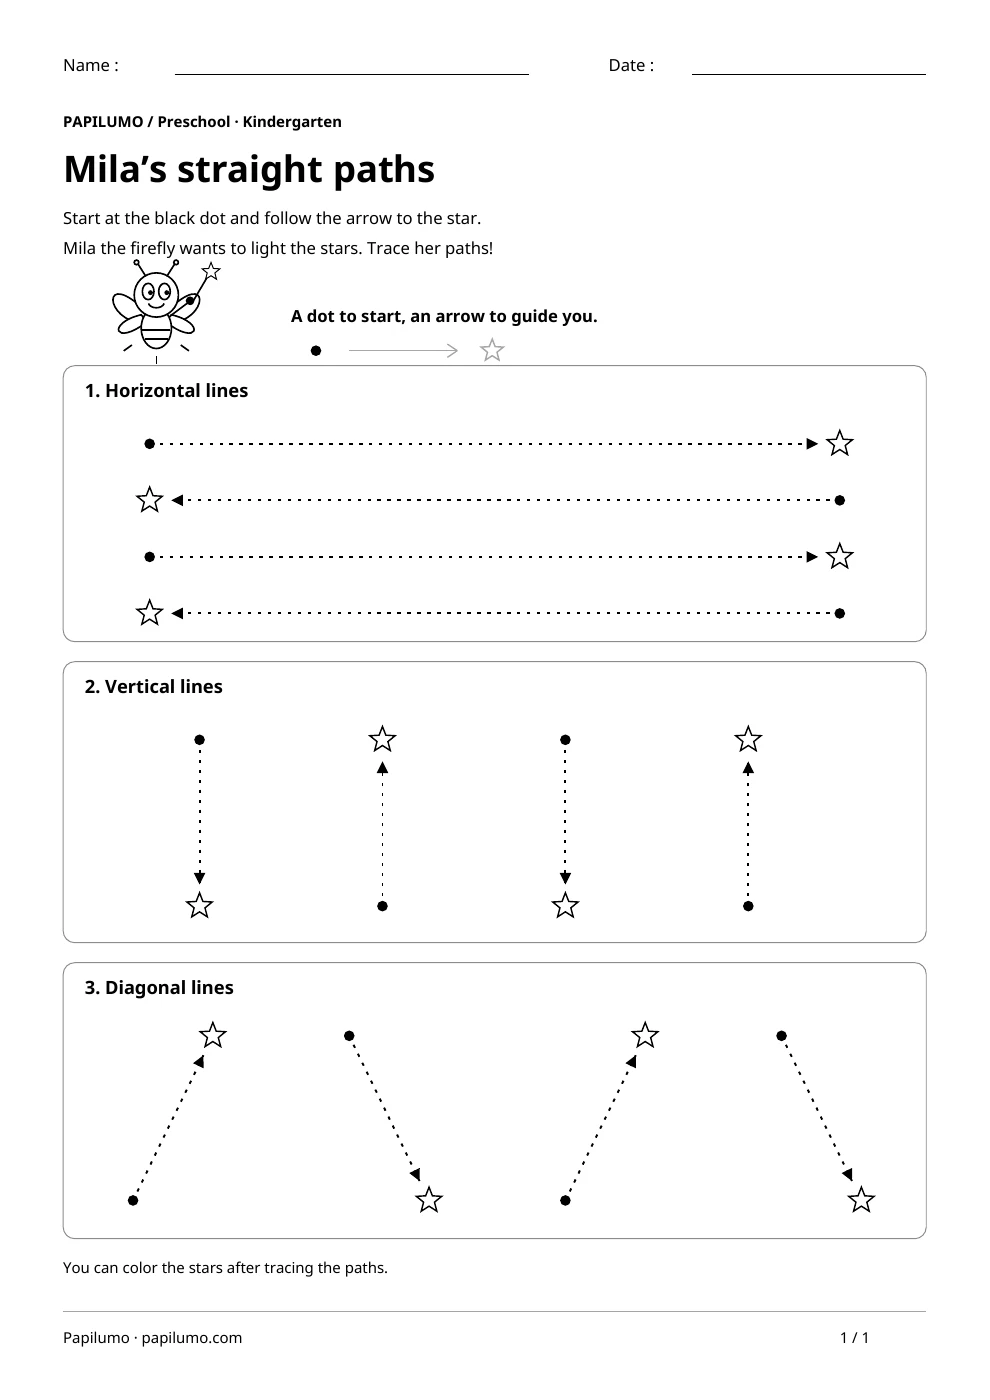
Let the child make one cut at a time. Between paths, set down the page and find the next starting point. Line 2 uses the same movement, with a little more distance to cover. Line 3 is the longest route. During each cut, the hand holding the paper stays in the clear area on the side opposite the scissors. Invite the child to tell you which letter Pico is getting ready to deliver. After all three paths, the right side still holds the sheet together. The child can then color Pico and his mailboxes. To vary the practice, try Horizontal, Vertical and Diagonal Line Tracing: Start at the black dot and follow the arrow to the star.
What to notice and how to check
Check whether each cut generally follows the dashed line and ends at its circle. A small wobble does not require starting again. The adult reference highlights all three paths so their endpoints are easy to compare. There are no numerical answers and no pieces to glue. If a cut goes past its circle, point out that marker before trying the next path.
Making the task easier
Try only path 1 at first. The adult can hold the right side while the child learns to open and close the scissors.
Keep the learning aim, but reduce how much the child has to handle at once. Cover part of the page with another sheet and reveal one task at a time. Demonstrate a separate example, then leave a real opportunity to work something out. An answer reached with support is still a useful attempt; it does not yet show that the same task can be completed independently.
Taking the idea beyond the worksheet
Use a fresh copy to repeat the paths and name the short, medium and long routes. Ask the child to explain how they know where to stop.
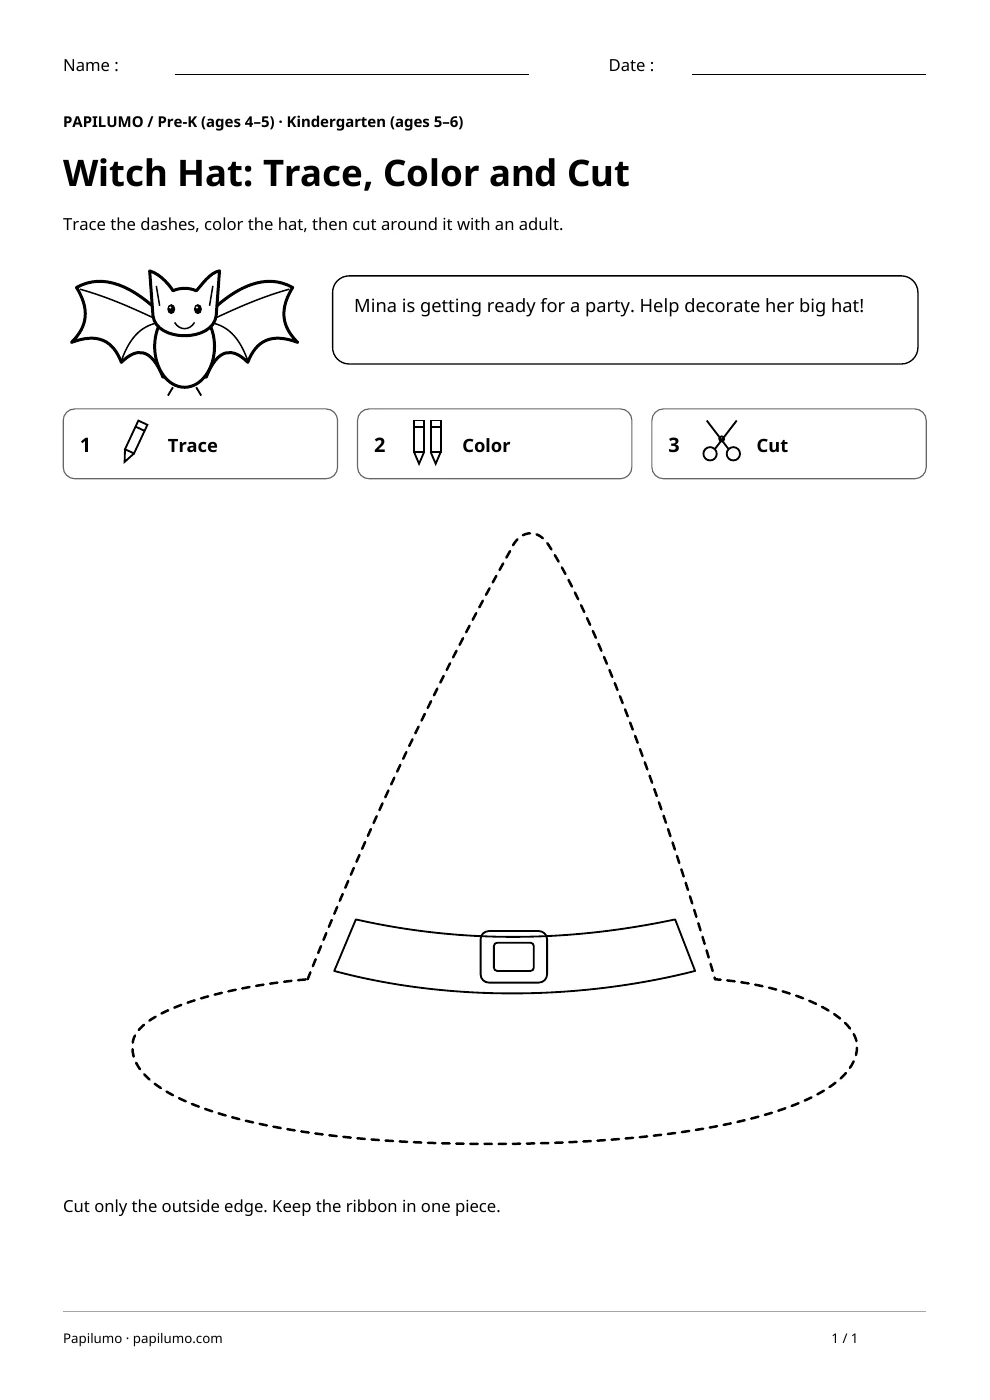
Use the follow-up to meet the same idea in a different setting. Offer it once the first task makes sense, without insisting that the whole page must be perfect. The child might explain a strategy, make an example or set a challenge for an adult. Return to the worksheet only when it helps connect the two situations. A short conversation or a practical activity can be enough to finish the session. To continue exploring, use Witch Hat: Trace, Color and Cut: Trace the dashes, color the hat, then cut around it with an adult.
Downloading and printing the PDF
This free PDF contains one worksheet designed for A4 paper. Download the file using the button on this page and open it in your PDF reader. Choose actual size or a 100% scale, check the orientation in the print preview and turn off any browser headers or footers. The illustrations use vector lines, so their outlines stay sharp when printed. Check the margins on one copy before preparing several sheets for a group. The level shown on the page is a guide, rather than a requirement to complete the activity at a particular age.