What this worksheet helps children practise
Always solve a missing edge factor from a known intersection product before multiplying the rest of the cutout!
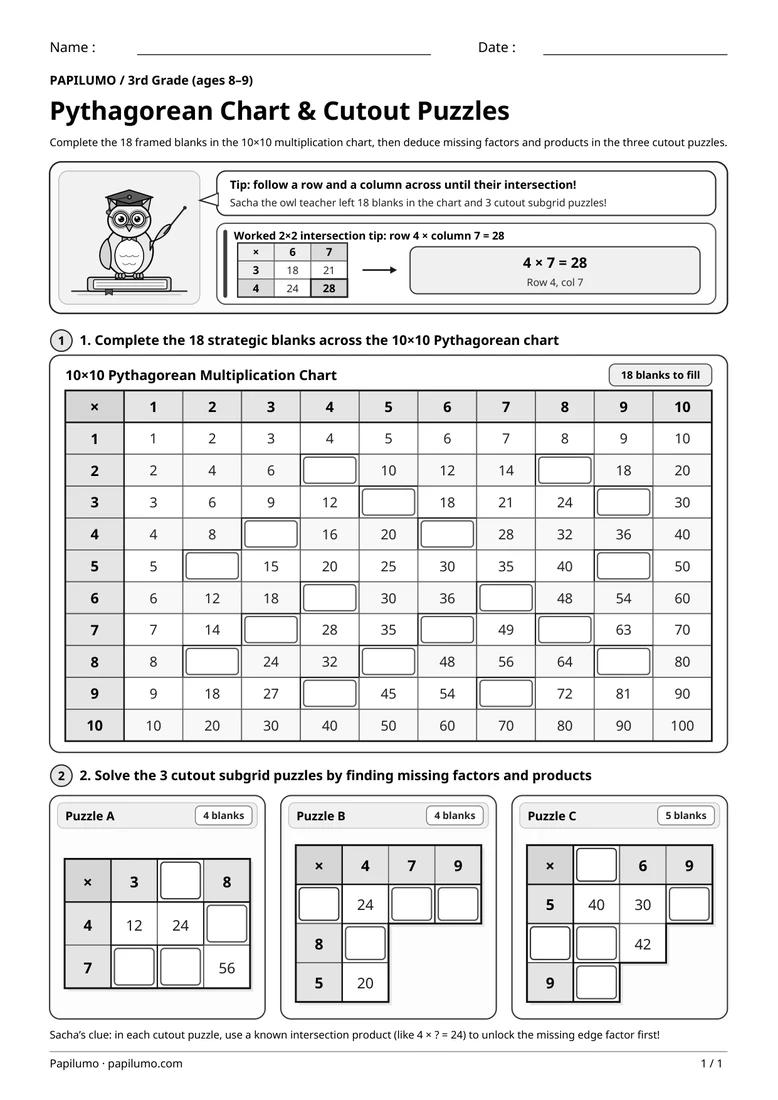
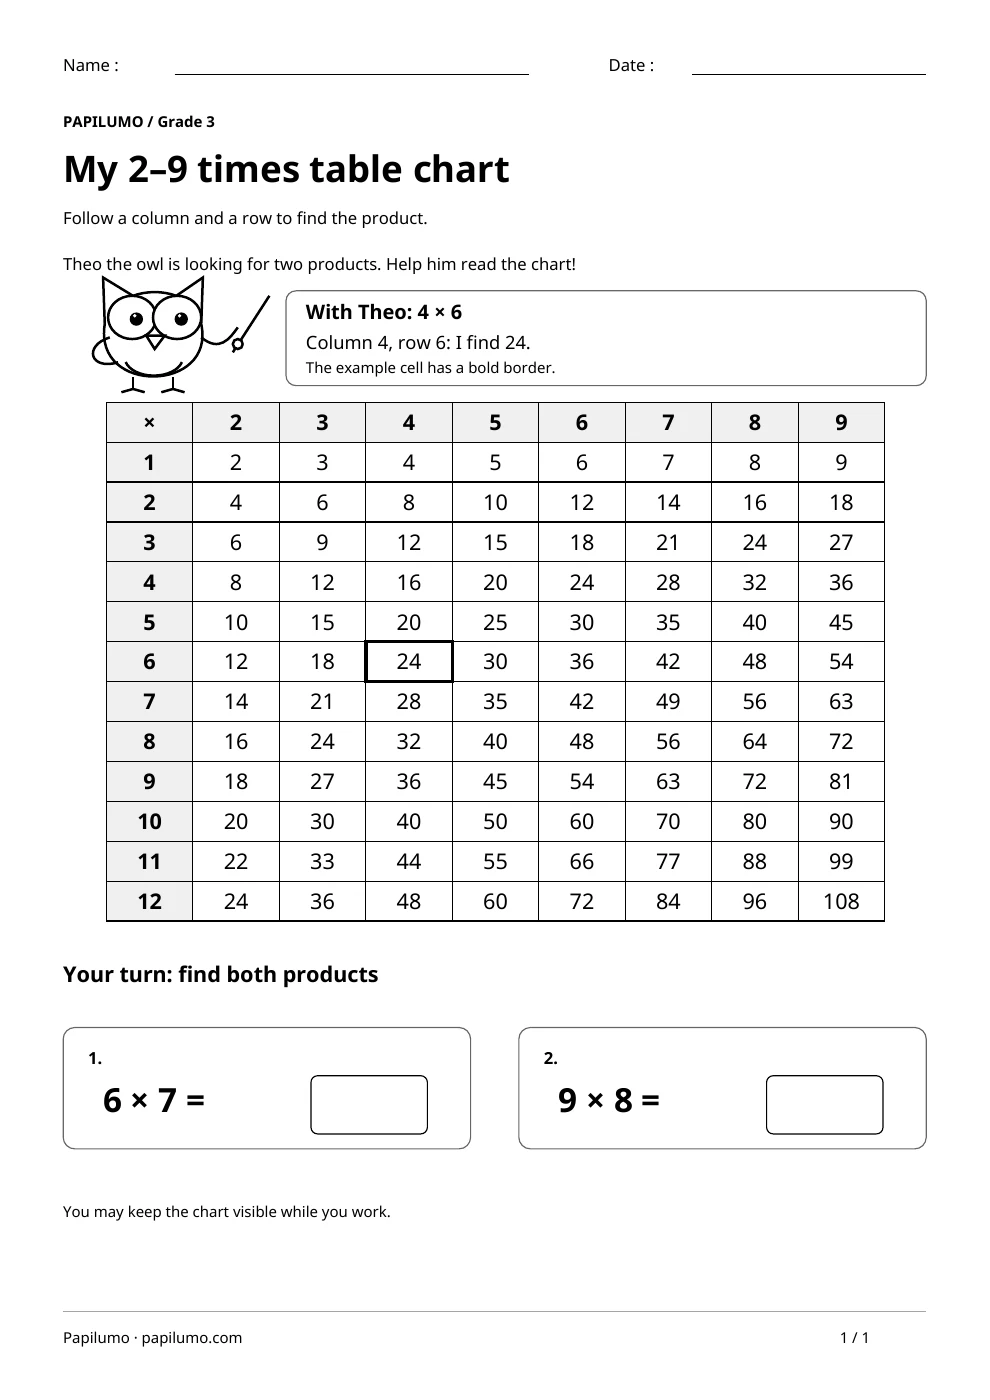
Completing a Pythagorean multiplication chart alongside cutout subgrid puzzles strengthens far more than rote times-table recall in 3rd Grade. Children learn to navigate two-way numerical coordinates, notice commutative symmetry across the main diagonal (such as 4 × 6 and 6 × 4), and connect multiplication facts directly to inverse division reasoning whenever an edge factor is missing. Moving smoothly between finding products and deducing unknown factors builds flexible algebraic thinking and rock-solid multiplication fluency. For a related skill, use Multiplication Chart for Times Tables 2–9: Follow a column and a row to find the product.
Preparing a short session
Print the student worksheet at actual size (100%) on plain white letter or A4 paper without shrinking the margins, and set out a sharpened pencil, a clean eraser, and optional scratch paper. Keep the separate one-page answer key PDF tucked away while the student works independently. Before starting Part 1, ask your child to trace one gray row header with a left finger and one gray column header with a right finger until both fingers meet cleanly on the shared product cell.
A concrete example to get started
Inside the framed top banner beside Sacha the owl teacher, the worked example highlights a crisp 2×2 mini-grid taken from rows 3 and 4 and columns 6 and 7, showing 18, 21, 24, and 28. A bold box frames 28 right where row 4 meets column 7, and a clean vector arrow points straight to the equation 4 × 7 = 28. This visual cue gives third graders an immediate, reliable strategy for locking onto the right intersection without drifting into a neighboring row.
Supporting the activity
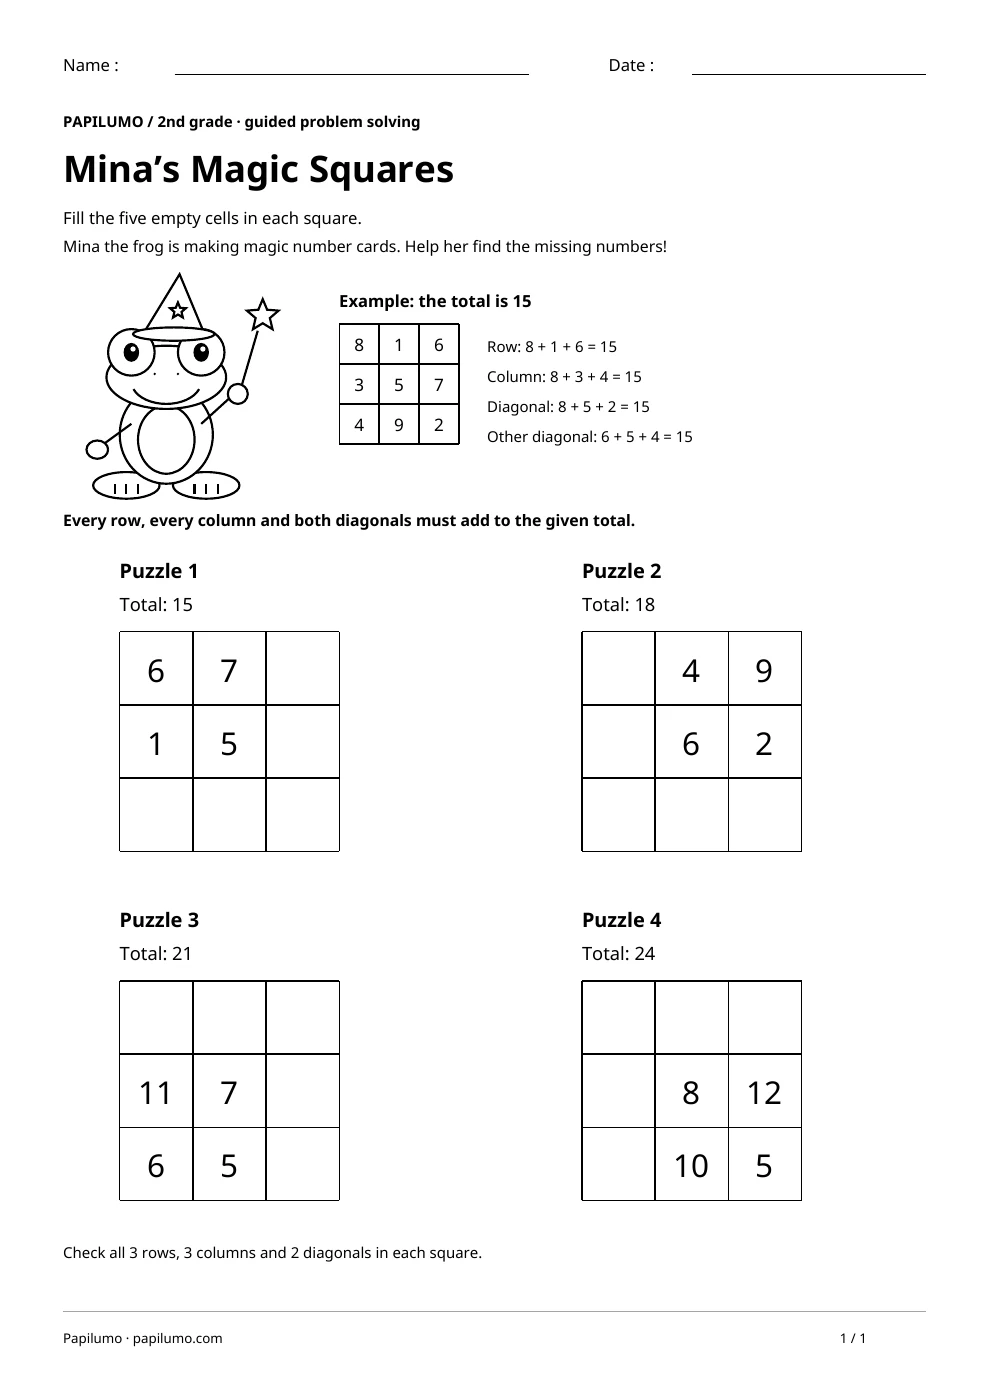
In Part 1, the 18 strategic blanks span tables 2 through 9: row 2 (8, 16), row 3 (15, 27), row 4 (12, 24), row 5 (10, 45), row 6 (24, 42), row 7 (21, 42, 56), row 8 (16, 40, 72), and row 9 (36, 63). In Part 2, Puzzle A starts with 4 × ? = 24 to reveal top factor 6, unlocking 32, 21, and 42. Puzzle B uses ? × 4 = 24 to find side factor 6, then 42, 54, and 32. Puzzle C uncovers top factor 8 (5 × 8 = 40) and side factor 7 (7 × 6 = 42), unlocking 45, 56, and 72. To vary the practice, try Magic Squares: Mina’s Four Number Puzzles: Fill the five empty cells in each square.
What to notice and how to check
When checking finished work against the separate one-page answer key PDF, inspect the upper-table blanks in rows 6 to 9 first—especially 42, 56, 63, and 72—since those facts need the most care. Next, verify every missing edge factor in Part 2 before checking the interior cells: 6 in Puzzle A, 6 in Puzzle B, and both 8 and 7 in Puzzle C. If any product is off, revisit the single division clue that determines its missing edge factor.
Making the task easier
Use two strips of paper along the gray row and column headers of the 10×10 chart to track each intersection accurately.
Keep the learning aim, but reduce how much the child has to handle at once. Cover part of the page with another sheet and reveal one task at a time. Demonstrate a separate example, then leave a real opportunity to work something out. An answer reached with support is still a useful attempt; it does not yet show that the same task can be completed independently.
Taking the idea beyond the worksheet
Design your own 5-cell L-shaped multiplication cutout puzzle on scratch paper and challenge a classmate or parent to solve the hidden factors.
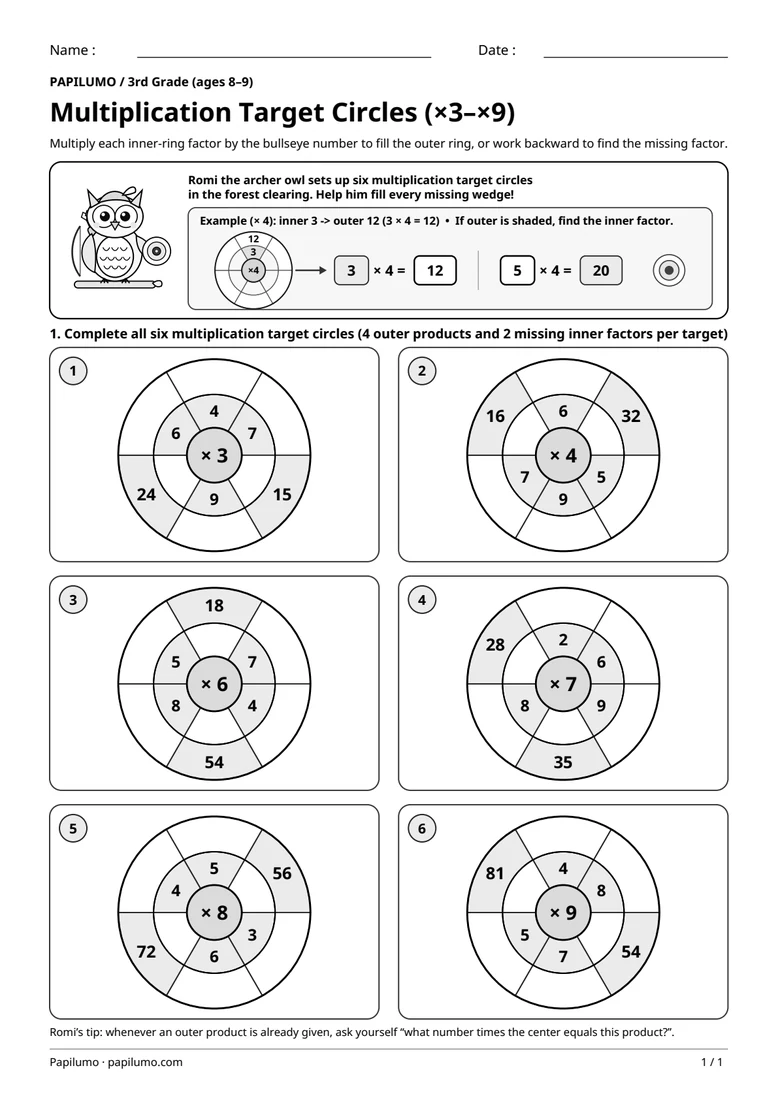
Use the follow-up to meet the same idea in a different setting. Offer it once the first task makes sense, without insisting that the whole page must be perfect. The child might explain a strategy, make an example or set a challenge for an adult. Return to the worksheet only when it helps connect the two situations. A short conversation or a practical activity can be enough to finish the session. To continue exploring, use Multiplication Target Circles (×3 to ×9) with Romi the Archer Owl: Multiply each inner-ring factor by the bullseye number to fill the outer ring, or work backward to find the missing factor.
Downloading and printing the PDF
This free PDF contains one worksheet designed for A4 paper. Download the file using the button on this page and open it in your PDF reader. Choose actual size or a 100% scale, check the orientation in the print preview and turn off any browser headers or footers. The illustrations use vector lines, so their outlines stay sharp when printed. Check the margins on one copy before preparing several sheets for a group. The level shown on the page is a guide, rather than a requirement to complete the activity at a particular age.