
What this worksheet helps children practise
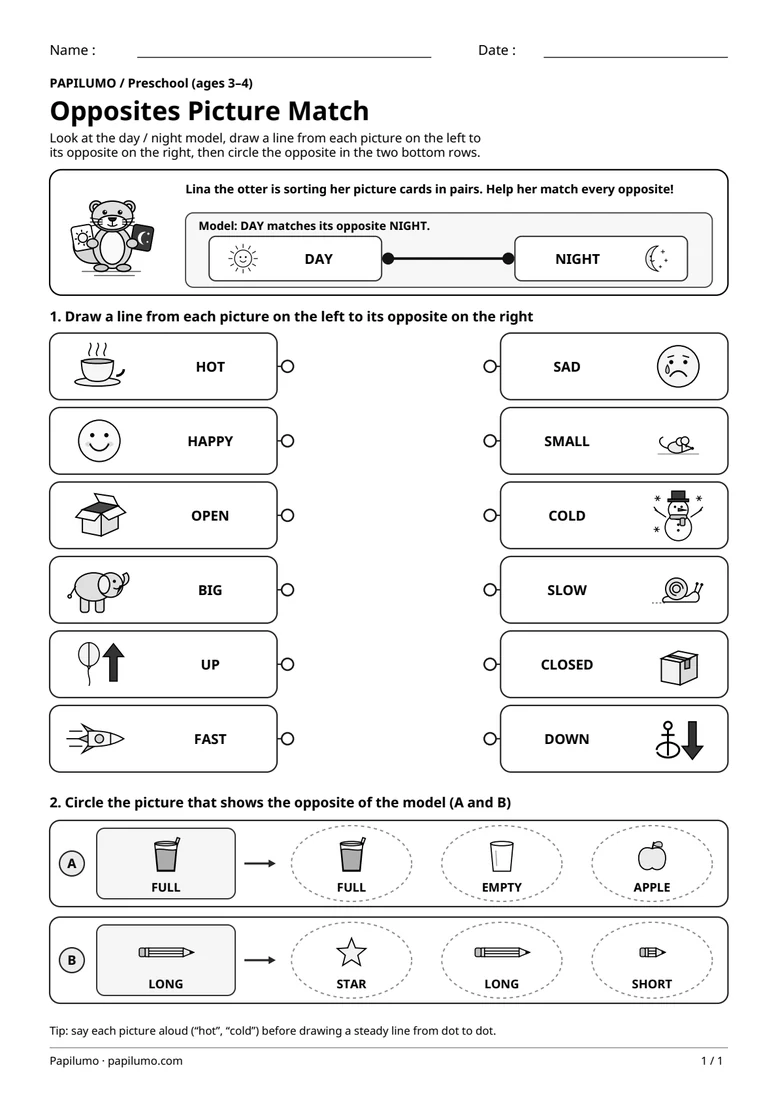
Tap the left dot with your finger, find the opposite picture on the right, and then connect the dots.
Matching opposite pictures in preschool builds spoken language, careful visual scanning, and early logical reasoning long before independent reading begins. As three- and four-year-olds compare concrete everyday pairs—such as hot versus cold, open versus closed, big versus small, or full versus empty—they discover how descriptive words carry contrasting meanings. Drawing straight lines between anchor dots while resisting identical distractor drawings in the bottom section also strengthens eye-hand coordination, spatial control across the page, and steady visual attention. For a related skill, use Feelings and Emotions Match with Noah the Cloud: Match each face on the left to its feeling on the right, then draw the eyes and mouth on the two blank faces below.
Preparing a short session
Print the student page at actual size (100%) on crisp white letter or A4 paper without shrinking page margins, and provide a chunky pencil, crayon, or washable marker suited to little hands. Keep the separate one-page answer key tucked out of sight while your child explores each picture independently. Before making any marks, talk briefly through the illustrations together without giving matches away—for instance, smile wide then frown sadly, or stretch arms wide for a big elephant and pinch fingers tiny for a little mouse.
A concrete example to get started
Inside the top banner right next to Lina the otter, the solved model displays a smiling sun labeled DAY connected by a bold dark line to a crescent moon and stars labeled NIGHT. Trace that connecting line with your child’s finger from left to right and say warmly, “Daytime brings the bright sun, and its opposite is nighttime with the moon.” Seeing the finished dot-to-dot link right at the top makes the task crystal clear: children connect two pictures that mean the opposite, never two identical objects.
Supporting the activity
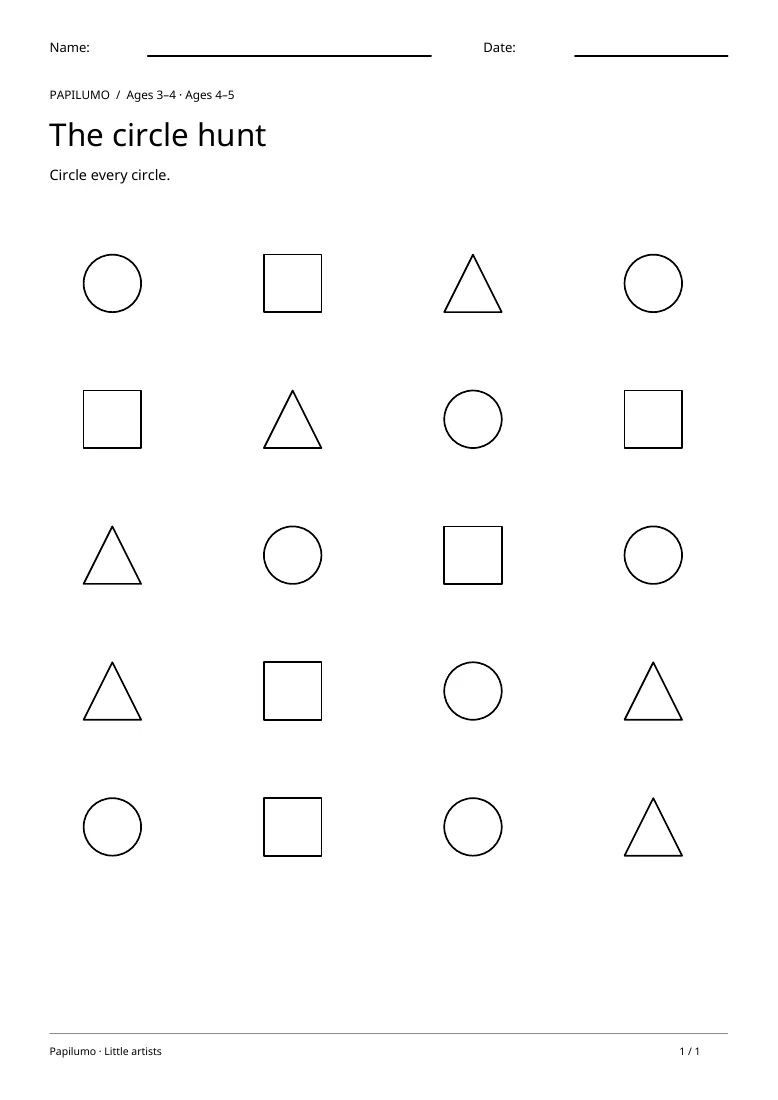
In Part 1, learners connect each left-hand anchor dot to its opposite picture on the right: steaming HOT tea links to the COLD snowman; the HAPPY face links to the SAD face; the OPEN box links to the CLOSED box; the BIG elephant links to the SMALL mouse; the balloon floating UP links to the anchor pointing DOWN; and the FAST rocket links to the SLOW snail. In Part 2, children trace or circle the EMPTY glass opposite FULL in row A (beside an apple distractor), then the SHORT pencil opposite LONG in row B (beside a star). To vary the practice, try Preschool Shape Worksheet: Find the Circles: Circle every circle.
What to notice and how to check
When reviewing with the separate one-page answer key PDF showing all six matching lines and both circled answers, invite your child to run a finger along each drawn path and name both opposite words aloud. If a line lands on a nearby picture or if your preschooler circles the identical twin glass or pencil in Part 2 instead of its opposite, gently act out the contrast together—“This glass is full to the top; which glass has nothing inside?”—before erasing and correcting calmly.
Making the task easier
Say both opposite words aloud together (“open box… closed box!”) before drawing each line across the middle.
Keep the learning aim, but reduce how much the child has to handle at once. Cover part of the page with another sheet and reveal one task at a time. Demonstrate a separate example, then leave a real opportunity to work something out. An answer reached with support is still a useful attempt; it does not yet show that the same task can be completed independently.
Taking the idea beyond the worksheet
Play a quick opposite hunt at home with real objects or actions: light on/off, dry/wet, stand up/sit down.
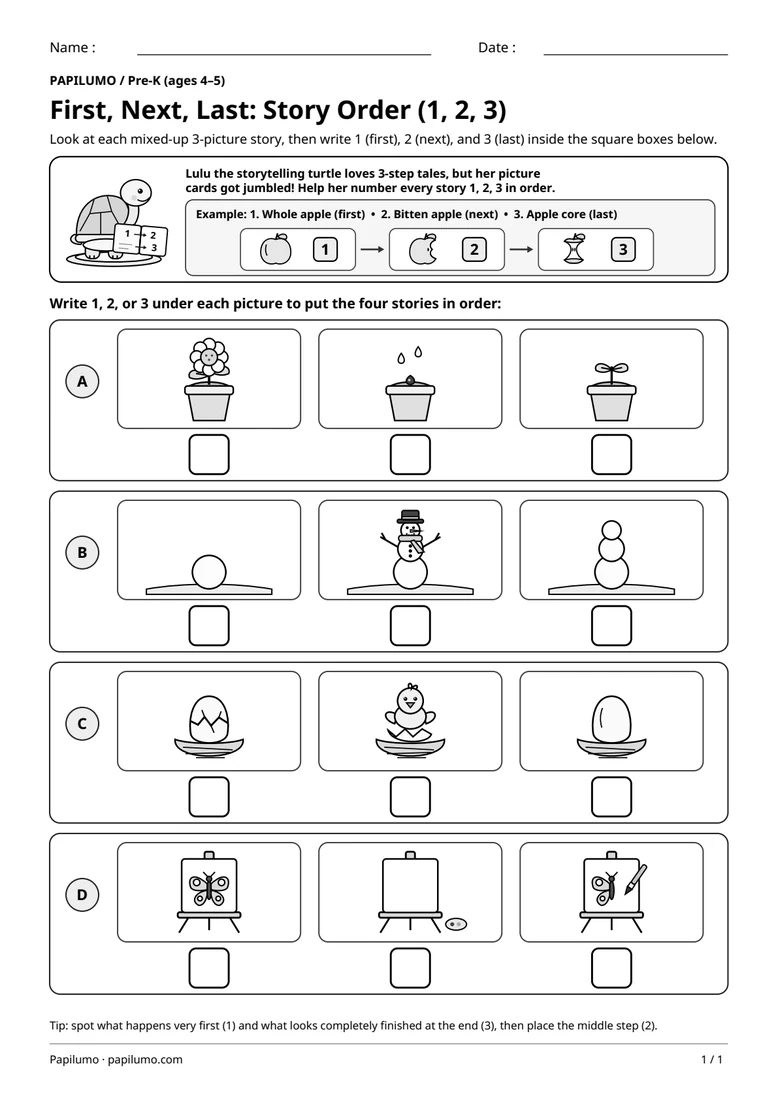
Use the follow-up to meet the same idea in a different setting. Offer it once the first task makes sense, without insisting that the whole page must be perfect. The child might explain a strategy, make an example or set a challenge for an adult. Return to the worksheet only when it helps connect the two situations. A short conversation or a practical activity can be enough to finish the session. To continue exploring, use First, Next, Last Picture Sequencing with Lulu the Turtle: Look at each mixed-up 3-picture story, then write 1 (first), 2 (next), and 3 (last) inside the square boxes below.
Downloading and printing the PDF
This free PDF contains one worksheet designed for A4 paper. Download the file using the button on this page and open it in your PDF reader. Choose actual size or a 100% scale, check the orientation in the print preview and turn off any browser headers or footers. The illustrations use vector lines, so their outlines stay sharp when printed. Check the margins on one copy before preparing several sheets for a group. The level shown on the page is a guide, rather than a requirement to complete the activity at a particular age.