

What this worksheet helps children practise
Always read the sign badge first—circle for +, square for −—then double-check with the opposite fact!
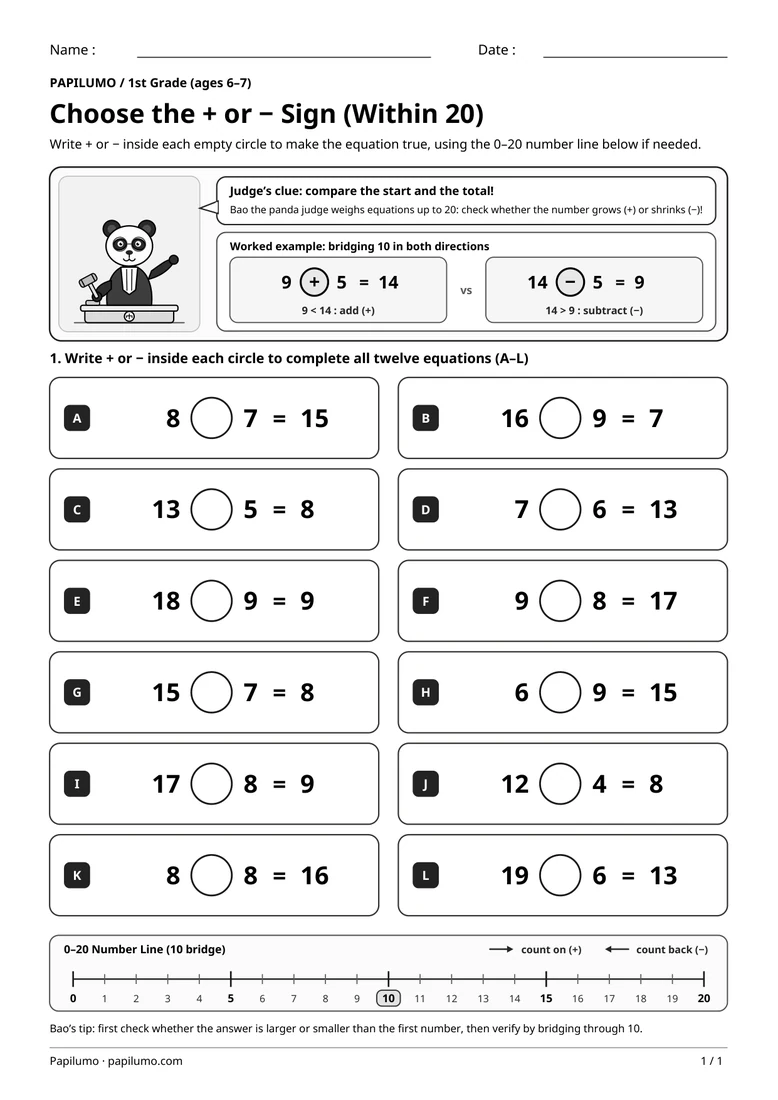
Switching smoothly between addition and subtraction within 20 in 2nd grade builds both visual attention and mental fact fluency. Young learners often stay on autopilot from one problem to the next and accidentally add when a minus sign appears. Placing + inside a bold circle pill and − inside a square pill cues children to verify the operation first. The closing inverse pairs reinforce how addition and subtraction undo each other, strengthening fact families, number sense, and independent self-checking habits before two-digit regrouping. For a related skill, use Choose + or −: Missing Signs Within 20 with Bao: Write + or − inside each empty circle to make the equation true, using the 0–20 number line below if needed.
Preparing a short session
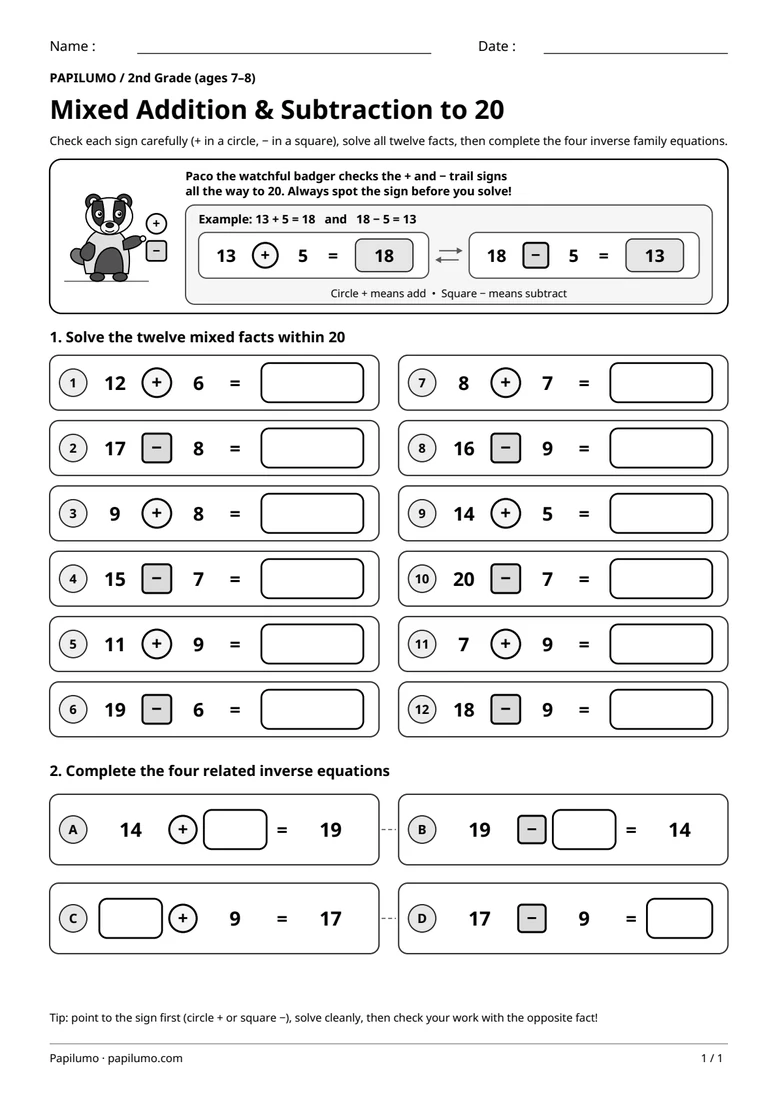
Print the student worksheet at actual size (100%) on plain white A4 or letter paper without shrinking margins, and provide a sharpened pencil with a soft eraser. Keep the separate one-page answer key out of sight while your child works. Before writing in the very first box, look together at Paco the watchful badger at the top and trace both equations in the example pair: 13 + 5 = 18 with the circle sign, then 18 − 5 = 13 with the square sign.
A concrete example to get started
Inside the top example panel next to Paco the watchful badger, the pair 13 + 5 = 18 and 18 − 5 = 13 shows how one trio of numbers tells two opposite math stories. Adding 5 to 13 climbs up to 18, and subtracting 5 right back from 18 returns straight to 13. Keeping that inverse link in mind helps second graders solve trickier bridging differences such as 17 − 8 by thinking what number added to 8 makes 17.
Supporting the activity
In Part 1, students fill twelve roomy alternating equation cards down both columns: 12 + 6 = [18], 17 − 8 = [9], 9 + 8 = [17], 15 − 7 = [8], 11 + 9 = [20], 19 − 6 = [13], 8 + 7 = [15], 16 − 9 = [7], 14 + 5 = [19], 20 − 7 = [13], 7 + 9 = [16], and 18 − 9 = [9]. In Part 2, four missing-number equations connect two inverse pairs: 14 + [5] = 19, 19 − [5] = 14, [8] + 9 = 17, and 17 − 9 = [8]. To vary the practice, try 3-Tier Addition Number Pyramids up to 30 with Nino the Builder Beaver: Each stone equals the sum of the two stones right below it. Fill in every white stone.
What to notice and how to check
When reviewing with the separate PDF answer key, check the bridging subtractions closely—especially 17 − 8 = 9, 15 − 7 = 8, 16 − 9 = 7, and 20 − 7 = 13. If an unexpected answer such as 25 or 23 appears instead of 9 or 7, your child likely added without noticing the square − badge. Have them tap and name the operation badge aloud before recalculating cleanly, then confirm the four Part 2 missing numbers (5, 5, 8, and 8).
Making the task easier
Lightly shade every square − badge with a pencil first so every subtraction stands out clearly before solving.
Keep the learning aim, but reduce how much the child has to handle at once. Cover part of the page with another sheet and reveal one task at a time. Demonstrate a separate example, then leave a real opportunity to work something out. An answer reached with support is still a useful attempt; it does not yet show that the same task can be completed independently.
Taking the idea beyond the worksheet
Pick a new trio like 6, 8, and 14 and write two addition facts and two subtraction facts in the same family.
Use the follow-up to meet the same idea in a different setting. Offer it once the first task makes sense, without insisting that the whole page must be perfect. The child might explain a strategy, make an example or set a challenge for an adult. Return to the worksheet only when it helps connect the two situations. A short conversation or a practical activity can be enough to finish the session. To continue exploring, use Subtraction Within 20 with Ten-Frames: Cross Out Berries with Mimi: Cross out the berries being taken away (clear the second frame first to get back to 10), then write the answer.
Downloading and printing the PDF
This free PDF contains one worksheet designed for A4 paper. Download the file using the button on this page and open it in your PDF reader. Choose actual size or a 100% scale, check the orientation in the print preview and turn off any browser headers or footers. The illustrations use vector lines, so their outlines stay sharp when printed. Check the margins on one copy before preparing several sheets for a group. The level shown on the page is a guide, rather than a requirement to complete the activity at a particular age.